Как создавать кнопки для мобильных телефонов с помощью jQuery EasyUI Mobile?
EasyUI - это платформа HTML5 для использования компонентов пользовательского интерфейса на основе технологий jQuery, React, Angular и Vue. Это помогает создавать функции для интерактивных веб-приложений и мобильных приложений, экономя много времени для разработчиков.
В этой статье мы научимся создавать различные стили кнопок для пользовательского интерфейса мобильных приложений.
Загрузки EasyUI для jQuery:
https://www.jeasyui.com/download/index.php
Пожалуйста, позаботьтесь о правильных путях к файлам при внедрении ваших кодов.
Пример 1. Следующий код демонстрирует основные кнопки типа входа в систему для некоторых целей пользовательского интерфейса.
html
<!DOCTYPE html>< html >< head > < meta charset = "UTF-8" > < meta name = "viewport" content=" initial-scale = 1 .0, maximum-scale = 1 .0, user-scalable = no "> < link rel = "stylesheet" type = "text/css" href = "themes/metro/easyui.css" > < link rel = "stylesheet" type = "text/css" href = "themes/mobile.css" > < link rel = "stylesheet" type = "text/css" href = "themes/icon.css" > <!--jQuery library --> < script type = "text/javascript" src = "jquery.min.js" > </ script > <!--jQuery libraries of EasyUI and EasyUI Mobile --> < script type = "text/javascript" src = "jquery.easyui.min.js" > </ script > < script type = "text/javascript" src = "jquery.easyui.mobile.js" > </ script ></ head >< body > < div class = "easyui-navpanel" > < header > < div class = "m-toolbar" > < span class = "m-title" >Login</ span > </ div > </ header > < div style="margin:20px auto;width:100px; height:100px;border-radius:100px; overflow:hidden"> < img src = "images/geeksImage.PNG" style = "margin:0;width:100%;height:100%;" > </ div > < div style = "padding:0 20px" > < div style = "margin-bottom:10px" > < input class = "easyui-textbox" data-options="prompt:'Enter username', iconCls:'icon-man'" style = "width:100%;height:38px" > </ div > < div > < input class = "easyui-passwordbox" data-options = "prompt:'Enter password'" style = "width:100%;height:38px" > </ div > < div style = "text-align:center;margin-top:30px" > < a href = "#" class = "easyui-linkbutton" style = "width:100%;height:40px" > < span style = "font-size:16px" > Login </ span ></ a > </ div > < div style = "text-align:center;margin-top:30px" > < a href = "#" class = "easyui-linkbutton" plain = "true" outline = "true" style = "width:100px;height:35px" > < span style = "font-size:16px" > Register </ span ></ a > </ div > </ div > </ div ></ body ></ html > |
Выход:

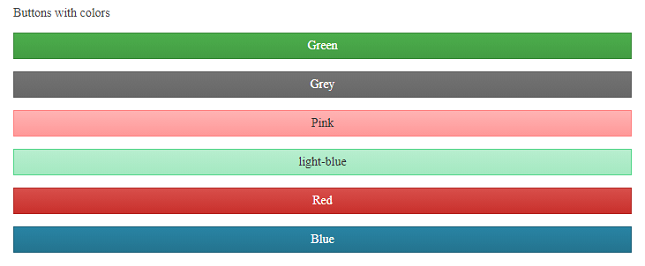
Пример 2: В следующем коде показаны несколько разноцветных кнопок для включения в приложение пользовательского интерфейса для мобильных устройств.
html
<!DOCTYPE html>< html >< head > < meta charset = "UTF-8" > < meta name = "viewport" content=" initial-scale = 1 .0, maximum-scale = 1 .0, user-scalable = no "> <!--EasyUI specific stylesheets --> < link rel = "stylesheet" type = "text/css" href = "themes/metro/easyui.css" > <!--EasyUI stylesheet for colours --> < link rel = "stylesheet" type = "text/css" href = "themes/mobile.css" > < link rel = "stylesheet" type = "text/css" href = "themes/color.css" > < link rel = "stylesheet" type = "text/css" href = "themes/icon.css" > <!--jQuery library --> < script type = "text/javascript" src = "jquery.min.js" > </ script > <!--jQuery libraries of EasyUI and EasyUI Mobile --> < script type = "text/javascript" src = "jquery.easyui.min.js" > </ script > < script type = "text/javascript" src = "jquery.easyui.mobile.js" > </ script ></ head >< body > < div class = "easyui-navpanel" > < div style = "padding:20px" > < p >Buttons with colors</ p > < p >< a href = "#" class = "easyui-linkbutton c1" style = "width:100%" >Green</ a ></ p > < p >< a href = "#" class = "easyui-linkbutton c2" style = "width:100%" >Grey</ a ></ p > < p >< a href = "#" class = "easyui-linkbutton c3" style = "width:100%" >Pink</ a ></ p > < p >< a href = "#" class = "easyui-linkbutton c4" style = "width:100%" >light-blue</ a ></ p > < p >< a href = "#" class = "easyui-linkbutton c5" style = "width:100%" >Red</ a ></ p > < p >< a href = "#" class = "easyui-linkbutton c6" style = "width:100%" >Blue</ a ></ p > </ div > </ div ></ body ></ html > |
Выход:
Пример 3: Следующий код демонстрирует группу кнопок, которые расположены в одной строке по горизонтали или вертикали.
html
<!DOCTYPE html>< html >< head > < meta charset = "UTF-8" > < meta name = "viewport" content=" initial-scale = 1 .0, maximum-scale = 1 .0, user-scalable = no "> <!--EasyUI specific stylesheets --> < link rel = "stylesheet" type = "text/css" href = "themes/metro/easyui.css" > < link rel = "stylesheet" type = "text/css" href = "themes/mobile.css" > < link rel = "stylesheet" type = "text/css" href = "themes/icon.css" > <!--jQuery library --> < script type = "text/javascript" src = "jquery.min.js" > </ script > <!--jQuery libraries of EasyUI and EasyUI Mobile --> < script type = "text/javascript" src = "jquery.easyui.min.js" > </ script > < script type = "text/javascript" src = "jquery.easyui.mobile.js" > </ script > < style > p{ line-height:150%; } </ style ></ head >< body > < div class = "easyui-navpanel" > < header > < div class = "m-toolbar" > < div class = "m-title" > EasyUI Button Groups </ div > </ div > </ header > <!--EasyUI allows buttons along the same line --> < div style = "text-align:center;padding:10px" > < span class = "m-buttongroup" > < a href = "javascript:void(0)" class = "easyui-linkbutton" data-options = "toggle:true,group:'g1',selected:true" onclick = "display('#htmlDiv')" style = "width:80px;height:30px" >HTML</ a > < a href = "javascript:void(0)" class = "easyui-linkbutton" data-options = "toggle:true,group:'g1'" onclick = "display('#cssDiv')" style = "width:80px;height:30px" >CSS</ a > < a href = "javascript:void(0)" class = "easyui-linkbutton" data-options = "toggle:true,group:'g1'" onclick = "display('#phpDiv')" style = "width:80px;height:30px" >PHP</ a > </ span > </ div > < div id = "items" style = "padding:10px 20px;" > < div id = "htmlDiv" class = "m-item" > < p >HTML stands for HyperText Markup Language. It is used to design web pages using a markup language. HTML is the combination of Hypertext and Markup language. Hypertext defines the link between the web pages. A markup language is used to define the text document within tag which defines the structure of web pages.. </ p > </ div > < div id = "cssDiv" class = "m-item" style = "display:none" > < p >Cascading Style Sheets, fondly referred to as CSS, is a simply designed language intended to simplify the process of making web pages presentable. CSS allows you to apply styles to web pages. More importantly, CSS enables you to do this independent of the HTML that makes up each web page. </ p > </ div > < div id = "phpDiv" class = "m-item" style = "display:none" > < p >The term PHP is an acronym for PHP: Hypertext Preprocessor. PHP is a server-side scripting language designed specifically for web development. PHP can be easily embedded in HTML files and HTML codes can also be written in a PHP file. </ p > </ div > </ div > </ div > < script > function display(id){ $('div.m-item').hide(); $(id).show(); } </ script > </ body ></ html > |
Выход:
Пример 4: Следующий код демонстрирует кнопки переключения, такие как «вкл / выкл» для подключения к Интернету.
html
<!DOCTYPE html>< html >< head > < meta charset = "UTF-8" > < meta name = "viewport" content=" initial-scale = 1 .0, maximum-scale = 1 .0, user-scalable = no "> <!--EasyUI specific stylesheets --> < link rel = "stylesheet" type = "text/css" href = "themes/metro/easyui.css" > <!--EasyUI stylesheet for colours --> < link rel = "stylesheet" type = "text/css" href = "themes/mobile.css" > < link rel = "stylesheet" type = "text/css" href = "themes/color.css" > < link rel = "stylesheet" type = "text/css" href = "themes/icon.css" > <!--jQuery library --> < script type = "text/javascript" src = "jquery.min.js" > </ script > <!--jQuery libraries of EasyUI and EasyUI Mobile --> < script type = "text/javascript" src = "jquery.easyui.min.js" > </ script > < script type = "text/javascript" src = "jquery.easyui.mobile.js" > </ script ></ head >< body > < div class = "easyui-navpanel" > < header > < div class = "m-toolbar" > < span class = "m-title" > Switch Button Settings </ span > </ div > </ header > < ul class = "m-list" >РЕКОМЕНДУЕМЫЕ СТАТЬИ |