Универсальные представления на основе классов Django (создание, получение, обновление, удаление)
Django - это веб-фреймворк на основе Python, который позволяет быстро создавать веб-приложения. Он имеет встроенный интерфейс администратора, который упрощает работу с ним. Его часто называют фреймворком с включенными батареями, потому что он предоставляет встроенные средства для каждой функции. Базовые представления на основе классов - это расширенный набор встроенных представлений, которые используются для реализации стратегий выборочного представления, таких как создание, получение, обновление, удаление. Представления на основе классов упрощают использование, разделяя запросы GET и POST для представления. Они не заменяют функциональные представления, но имеют определенные отличия и преимущества по сравнению с функциональными представлениями:
- Организация кода, связанного с конкретными методами HTTP (GET, POST и т. Д.), Может быть решена отдельными методами вместо условного перехода.
- Объектно-ориентированные методы, такие как миксины (множественное наследование), могут использоваться для разделения кода на повторно используемые компоненты.
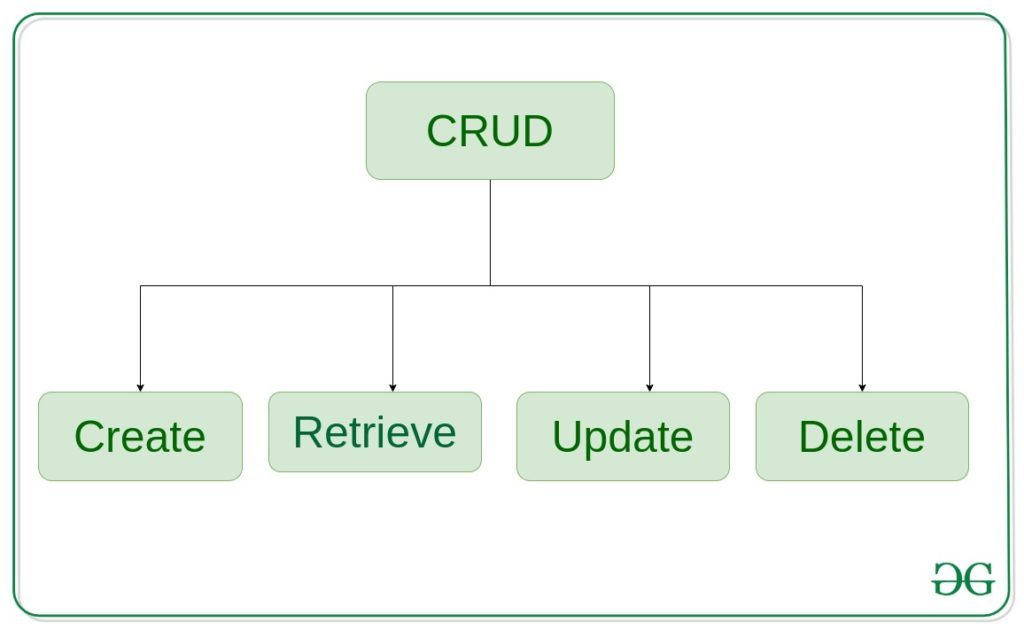
Эта статья посвящена полной реализации представлений на основе классов в Django (создание, получение, обновление, удаление). Давайте обсудим, что на самом деле означает CRUD,

CreateView - создавать или добавлять новые записи в таблицу в базе данных.
Получение представлений - чтение, получение, поиск или просмотр существующих записей в виде списка (ListView) или получение подробной информации о конкретной записи (DetailView)
UpdateView - обновить или отредактировать существующие записи в таблице в базе данных
DeleteView - удалить, деактивировать или удалить существующие записи в таблице в базе данных.
FormView - отображать форму в шаблоне и обрабатывать данные, введенные пользователем
Django CRUD (создание, получение, обновление, удаление) представлений на основе классов
Иллюстрация того, как создавать и использовать представления CRUD на примере. Рассмотрим проект под названием geeksforgeeks, в котором есть приложение под названием geeks.
Refer to the following articles to check how to create a project and an app in Django.
- How to Create a Basic Project using MVT in Django?
- How to Create an App in Django ?
After you have a project and an app, let’s create a model of which we will be creating instances through our view. In geeks/models.py,
Python3
# import the standard Django Model# from built-in libraryfrom django.db import models # declare a new model with a name "GeeksModel"class GeeksModel(models.Model): # fields of the model title = models.CharField(max_length = 200) description = models.TextField() # renames the instances of the model # with their title name def __str__(self): return self.title |
После создания этой модели нам нужно запустить две команды, чтобы создать для нее базу данных.
 Python manage.py makemigrations
Python manage.py migrate
Now we will create a Django ModelForm for this model. Refer this article for more on modelform – Django ModelForm – Create form from Models. create a file forms.py in geeks folder,
Python3
from django import formsfrom .models import GeeksModel# creating a formclass GeeksForm(forms.ModelForm): # create meta class class Meta: # specify model to be used model = GeeksModel # specify fields to be used fields = [ "title", "description", ] |
Using Class Based Views
At its core, a class-based view allows you to respond to different HTTP request methods with different class instance methods, instead of with conditionally branching code inside a single view function.
So where the code to handle HTTP GET in a view function would look something like:
Python3
from django.http import HttpResponsedef my_view(request): if request.method == "GET": # <view logic> return HttpResponse("result") |
In a class-based view, this would become:
Python3
from django.http import HttpResponsefrom django.views import Viewclass MyView(View): def get(self, request): # <view logic> return HttpResponse("result") |
Точно так же в urls.py нужно использовать метод as_view (), чтобы отличить представление на основе класса от представления на основе функций.
CreateView
Create View refers to a view (logic) to create an instance of a table in the database. We have already discussed basics of Create View in Create View – Function based Views Django. Class Based Views automatically setup everything from A to Z. One just needs to specify which model to create Create View for and the fields. Then Class based CreateView will automatically try to find a template in app_name/modelname_form.html. In our case it is geeks/templates/geeks/geeksmodel_form.html. Let’s create our class based view. In geeks/views.py,
Python3
from django.views.generic.edit import CreateViewfrom .models import GeeksModelclass GeeksCreate(CreateView): # specify the model for create view model = GeeksModel # specify the fields to be displayed fields = ["title", "description"] |
Now create a url path to map the view. In geeks/urls.py,
Python3
from django.urls import path# importing views from views..pyfrom .views import GeeksCreateurlpatterns = [ path("", GeeksCreate.as_view() ),] |
Create a template in templates/geeks/geeksmodel_form.html,
html
<form method="POST" enctype="multipart/form-data"> <!-- Security token --> {% csrf_token %} <!-- Using the formset --> {{ form.as_p }} <input type="submit" value="Submit"></form> |
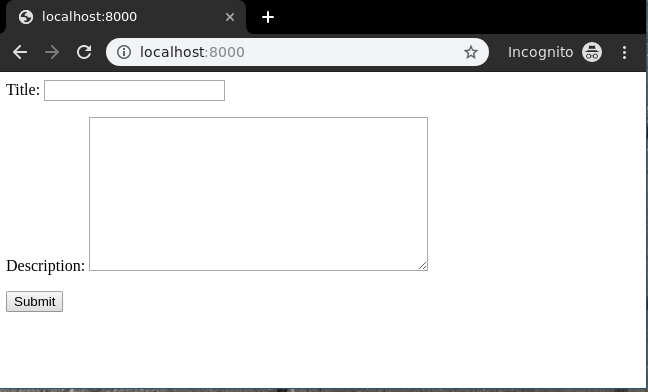
Проверим, что есть на http: // localhost: 8000 /

Чтобы проверить полную реализацию CreateView на основе классов, посетите Createview - Class Based Views Django.
Получить просмотры
Посмотреть список
List View refers to a view (logic) to display multiple instances of a table in the database. We have already discussed basics of List View in List View – Function based Views Django. Class Based Views automatically setup everything from A to Z. One just needs to specify which model to create ListView for, then Class based ListView will automatically try to find a template in app_name/modelname_list.html. In our case it is geeks/templates/geeks/geeksmodel_list.html. Let’s create our class based view. In geeks/views.py,
Python3
from django.views.generic.list import ListViewfrom .models import GeeksModelclass GeeksList(ListView): # specify the model for list view model = GeeksModel |
Now create a url path to map the view. In geeks/urls.py,
Python3
from django.urls import path# importing views from views..pyfrom .views import GeeksListurlpatterns = [ path("", GeeksList.as_view()),] |
Create a template in templates/geeks/geeksmodel_list.html,
html
<ul> <!-- Iterate over object_list --> {% for object in object_list %} <!-- Display Objects --> <li>{{ object.title }}</li> <li>{{ object.description }}</li> <hr/> <!-- If object_list is empty --> {% empty %} <li>No objects yet.</li> {% endfor %}</ul> |
Проверим, что есть на http: // localhost: 8000 /

Чтобы проверить полную реализацию ListView на основе классов, посетите ListView - Class Based Views Django
Подробный просмотр
Detail View refers to a view (logic) to display one instances of a table in the database. We have already discussed basics of Detail View in Detail View – Function based Views Django. Class Based Views automatically setup everything from A to Z. One just needs to specify which model to create DetailView for, then Class based DetailView will automatically try to find a template in app_name/modelname_detail.html. In our case it is geeks/templates/geeks/geeksmodel_detail.html. Let’s create our class based view. In geeks/views.py,
Python3
from django.views.generic.detail import DetailViewfrom .models import GeeksModelclass GeeksDetailView(DetailView): # specify the model to use model = GeeksModel |
Now create a url path to map the view. In geeks/urls.py,
Python3
from django.urls import path# importing views from views..pyfrom .views import GeeksDetailViewurlpatterns = [ # <pk> is identification for id field, # slug can also be used path("<pk>/", GeeksDetailView.as_view()),] |
Create a template in templates/geeks/geeksmodel_detail.html,
html
<h1>{{ object.title }}</h1><p>{{ object.description }}</p> |
Проверим, что есть на http: // localhost: 8000/1 /

Чтобы проверить полную реализацию DetailView на основе классов, посетите страницу DetailView - представления на основе классов Django.
UpdateView
UpdateView refers to a view (logic) to update a particular instance of a table from the database with some extra details. It is used to update entries in the database for example, updating an article at geeksforgeeks. We have already discussed basics of Update View in Update View – Function based Views Django. Class Based Views automatically setup everything from A to Z. One just needs to specify which model to create UpdateView for, then Class based UpdateView will automatically try to find a template in app_name/modelname_form.html. In our case it is geeks/templates/geeks/geeksmodel_form.html. Let’s create our class based view. In geeks/views.py,
Python3
# import generic UpdateViewfrom django.views.generic.edit import UpdateView# Relative import of GeeksModelfrom .models import GeeksModelclass GeeksUpdateView(UpdateView): # specify the model you want to use model = GeeksModel # specify the fields fields = [ "title", "description" ] # can specify success url # url to redirect after successfully # updating details success_url ="/" |
Now create a url path to map the view. In geeks/urls.py,
Python3
from django.urls import path# importing views from views..pyfrom .views import GeeksUpdateViewurlpatterns = [ # <pk> is identification for id field, # <slug> can also be used path("<pk>/update", GeeksUpdateView.as_view()),] |
Create a template in templates/geeks/geeksmodel_form.html,
html
<form method="post"> {% csrf_token %} {{ form.as_p }} <input type="submit" value="Save"></form> |
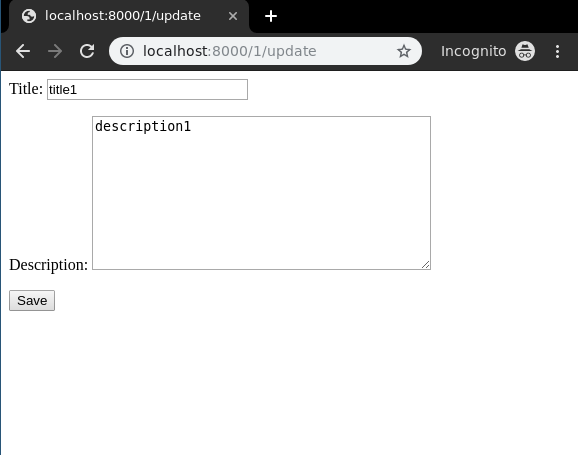
Проверим, что есть на http: // localhost: 8000/1 / update /

Чтобы проверить полную реализацию UpdateView на основе классов, посетите UpdateView - Class Based Views Django.
DeleteView
Delete View refers to a view (logic) to delete a particular instance of a table from the database. It is used to delete entries in the database for example, deleting an article at geeksforgeeks. We have already discussed basics of Delete View in Delete View – Function based Views Django. Class Based Views automatically setup everything from A to Z. One just needs to specify which model to create DeleteView for, then Class based DeleteViewde will automatically try to find a template in app_name/modelname_confirm_delete.html. In our case it is geeks/templates/geeks/geeksmodel_confirm_delete.html. Let’s create our class based view. In geeks/views.py,
Python3
# import generic UpdateViewfrom django.views.generic.edit import DeleteView# Relative import of GeeksModelfrom .models import GeeksModelclass GeeksDeleteView(DeleteView): # specify the model you want to use model = GeeksModel # can specify success url # url to redirect after successfully # deleting object success_url ="/" |
Now create a url path to map the view. In geeks/urls.py,
Python3
from django.urls import path# importing views from views..pyfrom .views import GeeksDeleteViewurlpatterns = [ # <pk> is identification for id field, # slug can also be used path("<pk>/delete/", GeeksDeleteView.as_view()),] |
Create a template in templates/geeks/geeksmodel_confirm_delete.html,
html
<form method="post">{% csrf_token %} <p>Are you sure you want to delete "{{ object }}"?</p> <input type="submit" value="Confirm"></form> |
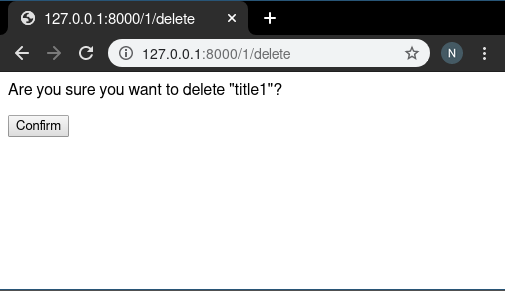
Проверим, что есть на http: // localhost: 8000/1 / delete

.
Чтобы проверить полную реализацию DeleteView на основе классов, посетите DeleteView - Class Based Views Django
FormView
FormView refers to a view (logic) to display and verify a Django Form. For example a form to register users at geeksforgeeks. Class Based Views automatically setup everything from A to Z. One just needs to specify which form to create FormView for and template_name, then Class based FormView will automatically render that form. Let’s create our class based view. In geeks/views.py,
Python3
# import generic FormViewfrom django.views.generic.edit import FormView# Relative import of GeeksFormfrom .forms import GeeksFormclass GeeksFormView(FormView): # specify the Form you want to use form_class = GeeksForm # sepcify name of template template_name = "geeks / geeksmodel_form.html" # can specify success url # url to redirect after successfully # updating details success_url ="/thanks/" |
Create a template for this view in geeks/geeksmodel_form.html,
html
<form method="post"> {% csrf_token %} {{ form.as_p }} <input type="submit" value="Save"></form> |
Map a url to this view in geeks/urls.py,
Python3
from django.urls import path# importing views from views..pyfrom .views import GeeksFormViewurlpatterns = [ path("", GeeksFormView.as_view()),] |
Теперь посетите http://127.0.0.1:8000/,

Чтобы проверить полную реализацию FormView на основе классов, посетите FormView - Class Based Views Django
Внимание компьютерщик! Укрепите свои основы с помощью базового курса программирования Python и изучите основы.
Для начала подготовьтесь к собеседованию. Расширьте свои концепции структур данных с помощью курса Python DS. А чтобы начать свое путешествие по машинному обучению, присоединяйтесь к курсу Машинное обучение - базовый уровень.