Создайте удобную боковую навигацию с помощью HTML, CSS и JavaScript

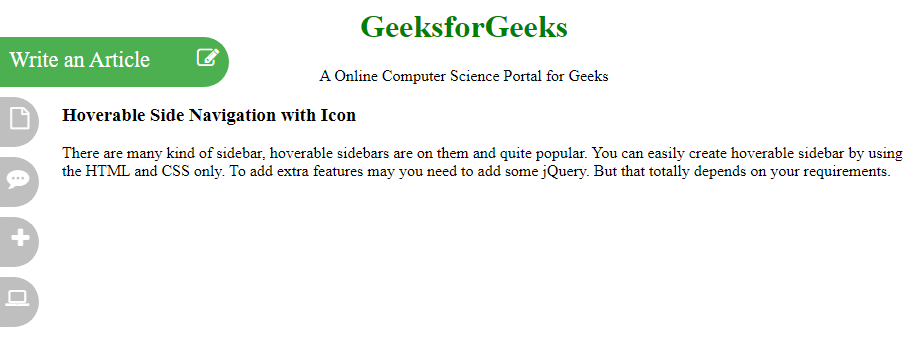
To create hoverable side navigation with icon on any website there is a need for two things HTML and CSS. If you want to attach the icons on the navigation bar then you need a font-awesome CDN link. These features make the website looks cool than a normal website where the nav-bar is old-school design. In this article, we will create the structure of the side with the side nav bar that will be Creating Structure section and the other section for designing the website i.e. Designing Structure. Below is the output of the complete code.
Creating Structure: In this section, we are creating the basic website structure and also attach the CDN link of the Font-Awesome for the icons which will be used as a hover nav bar icon.
- CDN links for the Icons from the Font Awesome:
<link rel=”stylesheet” href=”https://cdnjs.cloudflare.com/ajax/libs/font-awesome/4.7.0/css/font-awesome.min.css”>
- HTML code to make the structure:
html
<!DOCTYPE html><html><head> <title> Hoverable Side Navigation with Icon </title></head><body> <!-- Geeksforgeeks and Slogan --> <div class="banner"> <h1>GeeksforGeeks</h1> <p> A Online Computer Science Portal for Geeks </p> </div> <!-- Body content topic --> <div class="hoverable-topic"> <h3>Hoverable Side Navigation with Icon</h3> <p> There are many kind of sidebar, hoverable sidebars are on them and quite popular. You can easily create hoverable sidebar by using the HTML and CSS only. To add extra features may you need to add some jQuery. But that totally depends on your requirements. </p> </div> <!-- Side navigation Bar --> <div class="sidehoverbar"> <a href="#" class="article"> Write an Article <i class="fa fa-edit"></i> </a> <a href="#" class="Interview"> Interview Experience <i class="fa fa-file-o"></i> </a> <a href="#" class="Scripter"> Technical Scripter <i class="fa fa-commenting"></i> </a> <a href="#" class="Suggested"> Suggested Topic <i class="fa fa-plus"></i> </a> <a href="#" class="Practice"> Coding Practice <i class="fa fa-laptop"></i> </a> </div></body></html> |
Designing the Structure: In the previous section, we have created the structure of the basic website where we are going to use hoverable Side Navigation with the icon. In this section, we will design the structure and attach the icons for each navbar.
- CSS code to look good the structure:
html
<style> /* Head banner team */ .banner { text-align: center; width: ; } h1 { color: green; } /* styling sidebar */ .sidehoverbar a { background-color: grey; position: absolute; font-size: 22px; text-decoration: none; Color: white; padding: 10px; border-radius: 0px 25px 25px 0px; left: -190px; transition: 0.5s; opacity: 0.5; } /* Hover effect on sidebar */ .sidehoverbar a:hover { left: 0px; opacity: 1; background-color: #4CAF50; } /* float icons*/ .sidehoverbar i { float: right; } /* definig position of each nav bar */ .article { top: 50px; width: 210px; height: 30px; } .Interview { top: 110px; width: 210px; height: 30px; } .Scripter { top: 170px; width: 210px; height: 30px; } .Suggested { top: 230px; width: 210px; height: 30px; } .Practice { top: 290px; width: 210px; height: 30px; } /* content margin */ .hoverable-topic { margin-left: 55px; }</style> |
Объедините код HTML и CSS: это последний код, который представляет собой комбинацию двух вышеуказанных разделов.
Выход:
![]()