Создание приложений с несколькими экранами в Android
В этой статье показано, как создать приложение для Android для перехода от одного действия к другому. Ниже приведены шаги по созданию простого приложения для Android для перехода от одного действия к другому.
Пошаговая реализация
Шаг 1. Создайте новый проект в Android Studio.
Чтобы создать новый проект в Android Studio, обратитесь к разделу «Как создать/запустить новый проект в Android Studio». Код для этого был предоставлен как на Java, так и на языке программирования Kotlin для Android.
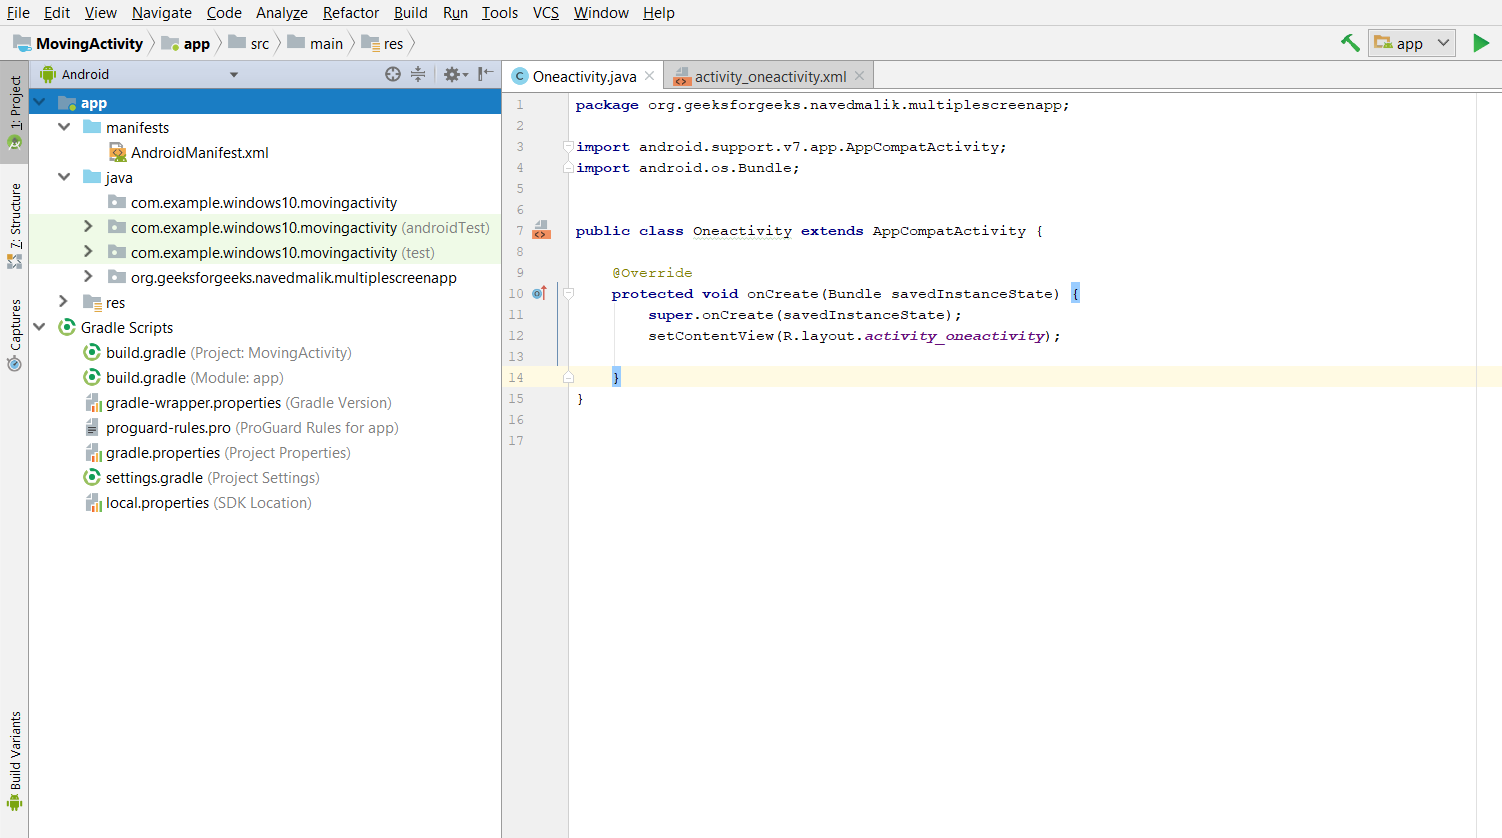
У вас будут файлы XML и Activity Files, путь к обоим файлам указан ниже.
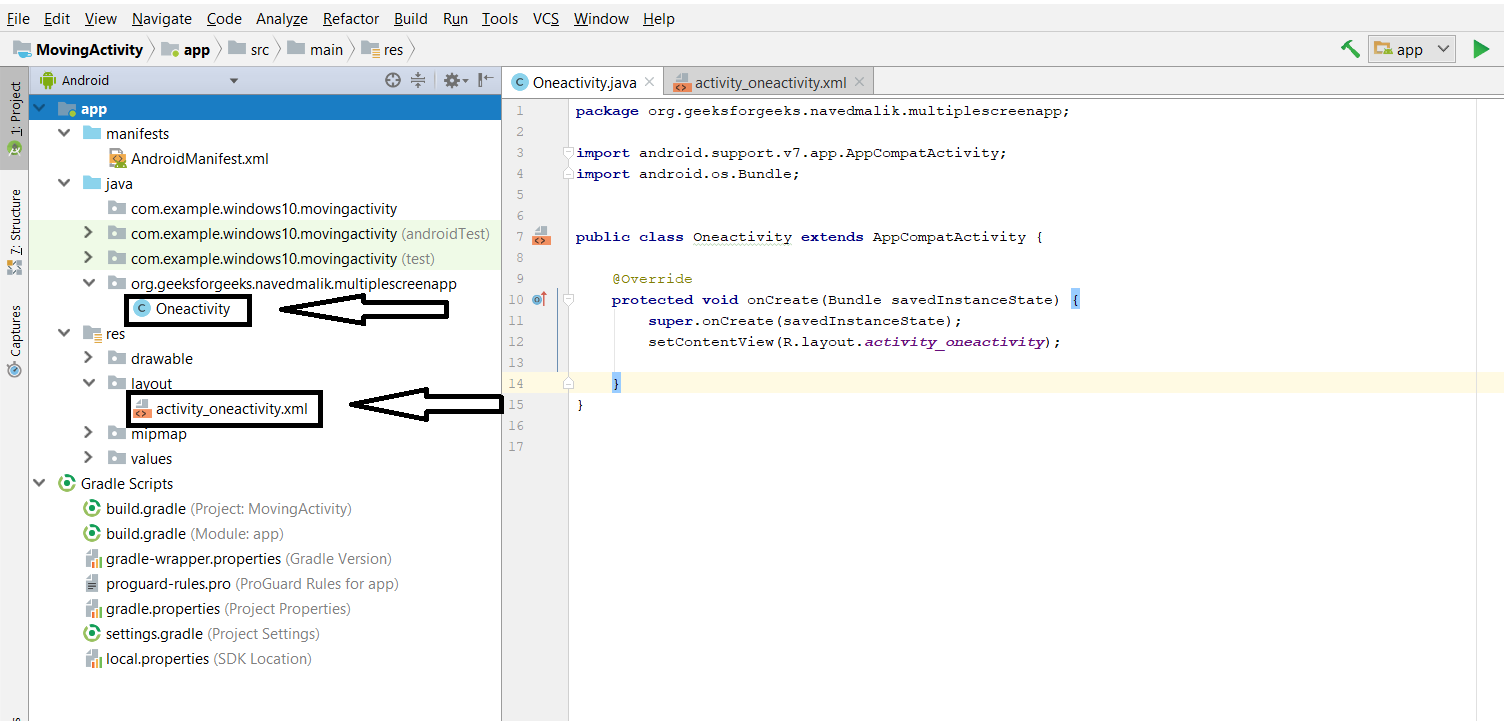
Шаг 2. Работа с файлами ActivityOne Kotlin/Java/XML
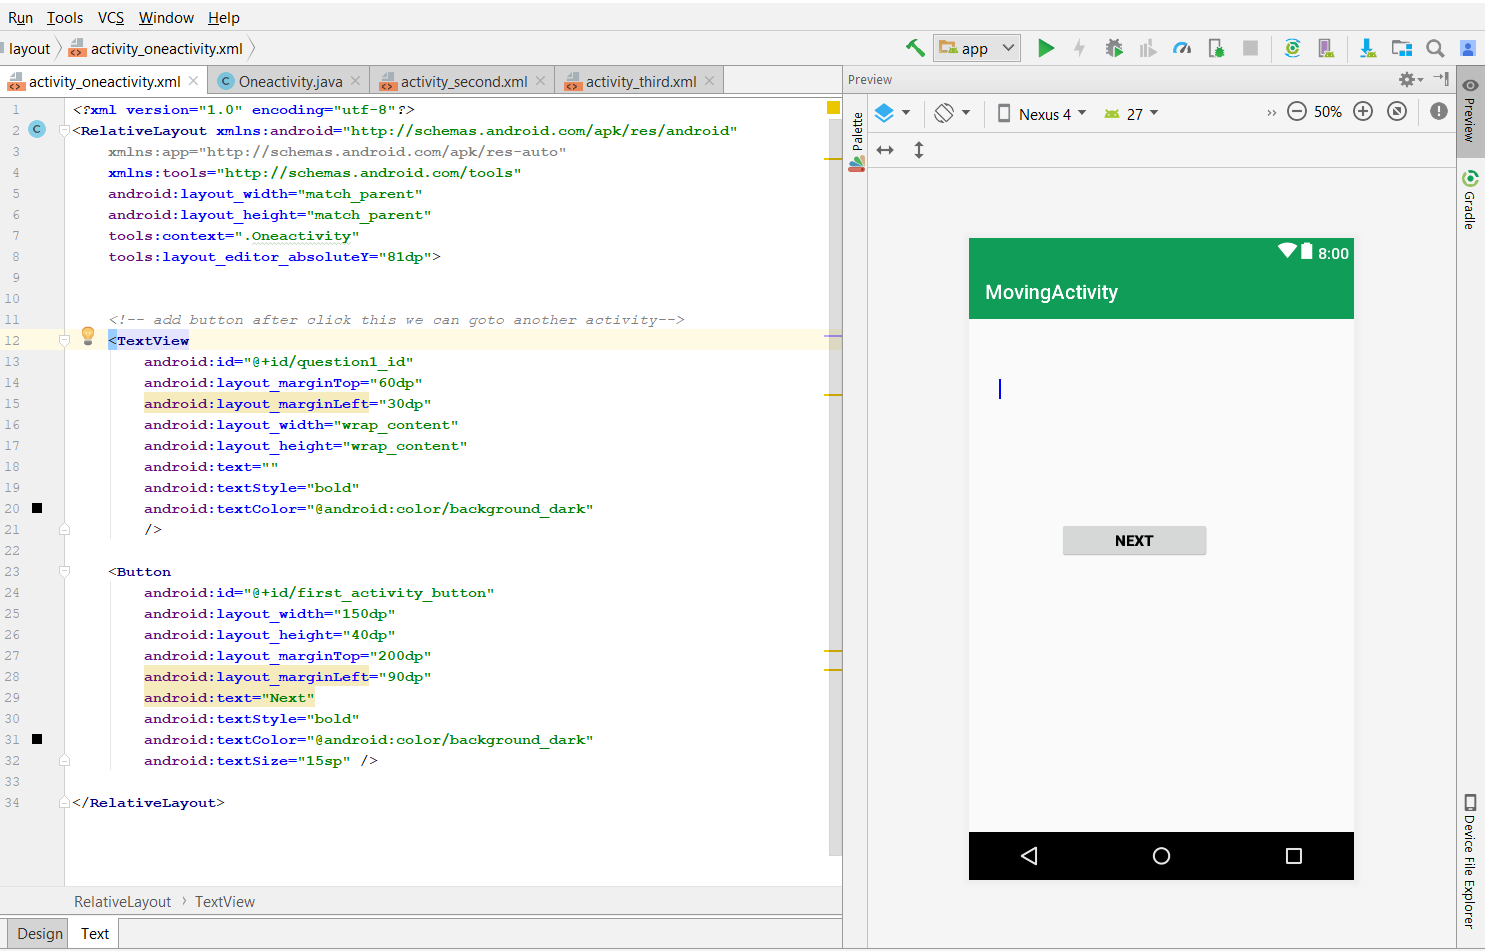
Далее переходим к файлу activity_main.xml , представляющему UI проекта. Ниже приведен код файла activity_main.xml . Комментарии добавляются внутри кода, чтобы понять код более подробно.
XML
<?xml version="1.0" encoding="utf-8"?> android:layout_width="match_parent" android:layout_height="match_parent" tools:context=".Oneactivity" tools:layout_editor_absoluteY="81dp"> <TextView android:id="@+id/question1_id" android:layout_width="wrap_content" android:layout_height="wrap_content" android:layout_marginLeft="30dp" android:layout_marginTop="60dp" android:text="" android:textColor="@android:color/background_dark" android:textStyle="bold" /> <!-- add button after click this we can goto another activity--> <Button android:id="@+id/first_activity_button" android:layout_width="150dp" android:layout_height="40dp" android:layout_marginLeft="90dp" android:layout_marginTop="200dp" android:text="Next" android:textColor="@android:color/background_dark" android:textSize="15sp" android:textStyle="bold" /></RelativeLayout> |
Перейдите в файл MainActivity и обратитесь к следующему коду.
Ниже приведен код файла MainActivity. Комментарии добавляются внутри кода, чтобы понять код более подробно.
Java
import android.content.Intent;import android.os.Bundle;import android.widget.Button;import android.widget.TextView;import androidx.appcompat.app.AppCompatActivity; public class Oneactivity extends AppCompatActivity { // define the global variable TextView question1; // Add button Move to Activity Button next_Activity_button; @Override protected void onCreate(Bundle savedInstanceState) { super.onCreate(savedInstanceState); setContentView(R.layout.activity_oneactivity); // by ID we can use each component which id is assign in xml file // use findViewById() to get the Button next_Activity_button = (Button) findViewById(R.id.first_activity_button); question1 = (TextView) findViewById(R.id.question1_id); // In question1 get the TextView use by findViewById() // In TextView set question Answer for message question1.setText("Q1 - How to pass the data between activities in Android?
" + "
" + "Ans - Intent"); // Add_button add clicklistener next_Activity_button.setOnClickListener(v -> { // Intents are objects of the android.content.Intent type. Your code can send them to the Android system defining // the components you are targeting. Intent to start an activity called SecondActivity with the following code. Intent intent = new Intent(Oneactivity.this, SecondActivity.class); // start the activity connect to the specified class startActivity(intent); }); }} |
Kotlin
import android.content.Intentimport android.os.Bundleimport android.widget.Buttonimport android.widget.TextViewimport androidx.appcompat.app.AppCompatActivity class Oneactivity : AppCompatActivity() { // define the global variable private lateinit var question1: TextView // Add button Move to Activity private lateinit var next_Activity_button: Button override fun onCreate(savedInstanceState: Bundle?) { super.onCreate(savedInstanceState) setContentView(R.layout.activity_oneactivity) // by ID we can use each component which id is assign in xml file // use findViewById() to get the Button next_Activity_button = findViewById(R.id.first_activity_button) question1 = findViewById(R.id.question1_id) // In question1 get the TextView use by findViewById() // In TextView set question Answer for message question1.text = "Q1 - How to pass the data between activities in Android? Ans - Intent".trimIndent() // Add_button add clicklistener next_Activity_button.setOnClickListener { // Intents are objects of the android.content.Intent type. Your code can send them to the Android system defining // the components you are targeting. Intent to start an activity called SecondActivity with the following code. val intent = Intent(this, SecondActivity::class.java) // start the activity connect to the specified class startActivity(intent) } }} |
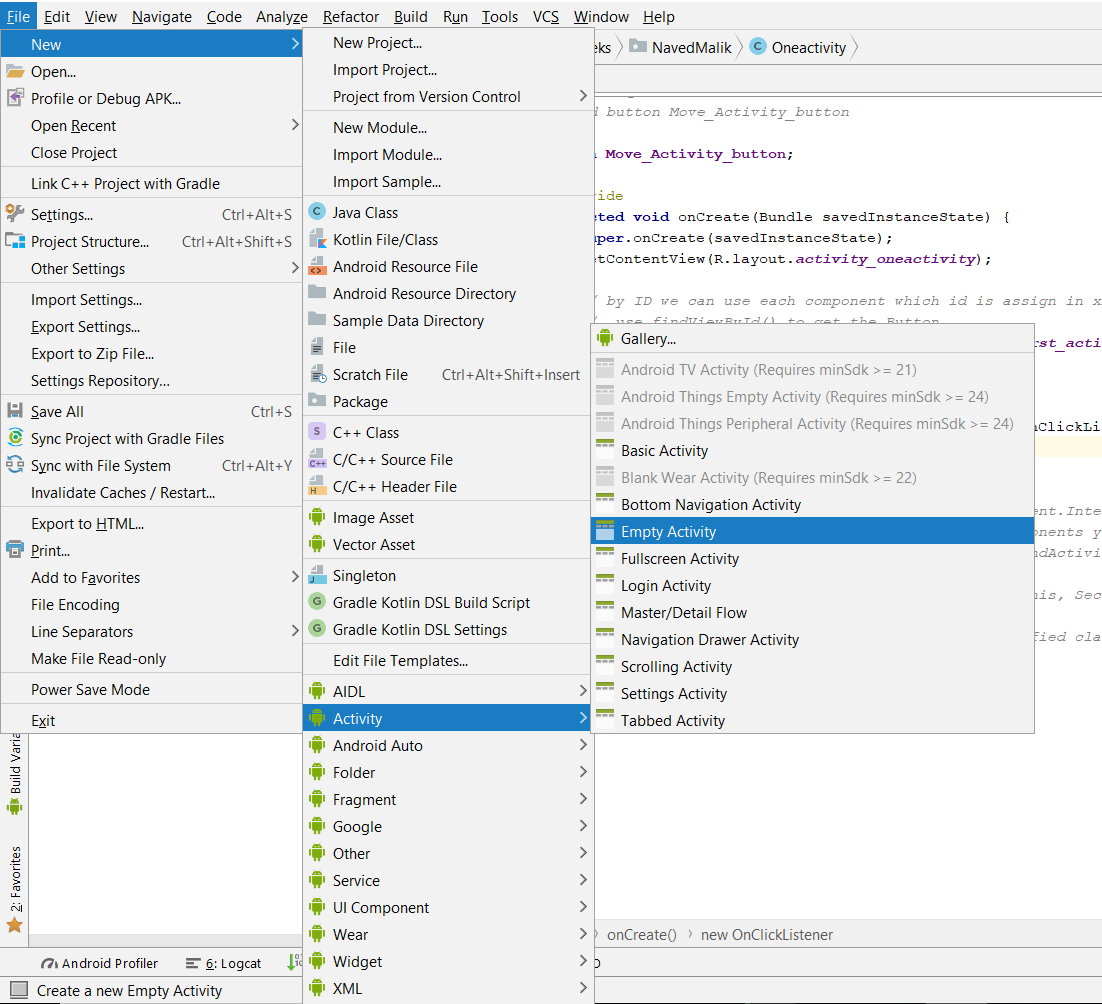
Теперь нам нужно создать еще одно действие (SecondActivity) для перехода от одного действия к другому.
Создайте вторую активность и перейдите в проект Android> Файл> новый> Активность> Пустая активность
Шаг 3: Работа с файлами ActivityTwo Kotlin/Java/XML
Далее переходим к файлу activity_main.xml , представляющему UI проекта. Ниже приведен код файла activity_main.xml . Комментарии добавляются внутри кода, чтобы понять код более подробно.
XML
<?xml version="1.0" encoding="utf-8"?> android:layout_width="match_parent" android:layout_height="match_parent" tools:context=".SecondActivity"> <TextView android:id="@+id/question2_id" android:layout_width="wrap_content" android:layout_height="wrap_content" android:layout_marginLeft="30dp" android:layout_marginTop="60dp" android:text="" android:textColor="@android:color/background_dark" android:textStyle="bold" /> <Button android:id="@+id/second_activity_next_button" android:layout_width="90dp" android:layout_height="40dp" android:layout_marginLeft="200dp" android:layout_marginTop="200dp" android:text="Next" android:textColor="@android:color/background_dark" android:textSize="15sp" android:textStyle="bold" /> <Button android:id="@+id/second_activity_previous_button" android:layout_width="110dp" android:layout_height="40dp" android:layout_marginLeft="50dp" android:layout_marginTop="200dp" android:text="previous" android:textColor="@android:color/background_dark" android:textSize="15sp" android:textStyle="bold" /></RelativeLayout> |
Перейдите в файл MainActivity и обратитесь к следующему коду.
Ниже приведен код файла MainActivity. Комментарии добавляются внутри кода, чтобы понять код более подробно.
Java
import android.content.Intent;import android.os.Bundle;import android.widget.Button;import android.widget.TextView;import androidx.appcompat.app.AppCompatActivity; public class SecondActivity extends AppCompatActivity { // define the global variable TextView question2; // Add button Move to next Activity and previous Activity Button next_button, previous_button; @Override protected void onCreate(Bundle savedInstanceState) { super.onCreate(savedInstanceState); setContentView(R.layout.activity_second); // by ID we can use each component which id is assign in xml // file use findViewById() to get the both Button and textview next_button = (Button) findViewById(R.id.second_activity_next_button); previous_button = (Button) findViewById(R.id.second_activity_previous_button); question2 = (TextView) findViewById(R.id.question2_id); // In question1 get the TextView use by findViewById() // In TextView set question Answer for message question2.setText("Q 2 - What is ADB in android?
" + "
" + "Ans- Android Debug Bridge"); // Add_button add clicklistener next_button.setOnClickListener(v -> { // Intents are objects of the android.content.Intent type. Your code can send them to the Android system defining // the components you are targeting. Intent to start an activity called ThirdActivity with the following code. Intent intent = new Intent(SecondActivity.this, ThirdActivity.class); // start the activity connect to the specified class startActivity(intent); }); // Add_button add clicklistener previous_button.setOnClickListener(v -> { // Intents are objects of the android.content.Intent type. Your code can send them to the Android system defining // the components you are targeting. Intent to start an activity called oneActivity with the following code Intent intent = new Intent(SecondActivity.this, Oneactivity.class); // start the activity connect to the specified class startActivity(intent); }); }} |
Kotlin
import android.content.Intentimport android.os.Bundleimport android.widget.Buttonimport android.widget.TextViewimport androidx.appcompat.app.AppCompatActivity class SecondActivity : AppCompatActivity() { // define the global variable private lateinit var question2: TextView // Add button Move to next Activity and previous Activity private lateinit var next_button: Button private lateinit var previous_button: Button override fun onCreate(savedInstanceState: Bundle?) { super.onCreate(savedInstanceState) setContentView(R.layout.activity_second) // by ID we can use each component which id is assign in xml // file use findViewById() to get the both Button and textview next_button = findViewById(R.id.second_activity_next_button) previous_button = findViewById(R.id.second_activity_previous_button) question2 = findViewById(R.id.question2_id) // In question1 get the TextView use by findViewById() // In TextView set question Answer for message question2.text = "Q2 - What is ADB in android? Ans - Android Debug Bridge".trimIndent() // Add_button add clicklistener next_button.setOnClickListener { // Intents are objects of the android.content.Intent type. Your code can send them to the Android system defining // the components you are targeting. Intent to start an activity called ThirdActivity with the following code. val intent = Intent(this, ThirdActivity::class.java) // start the activity connect to the specified class startActivity(intent) } // Add_button add clicklistener previous_button.setOnClickListener { // Intents are objects of the android.content.Intent type. Your code can send them to the Android system defining // the components you are targeting. Intent to start an activity called oneActivity with the following code val intent = Intent(this, Oneactivity::class.java) // start the activity connect to the specified class startActivity(intent) } }} |
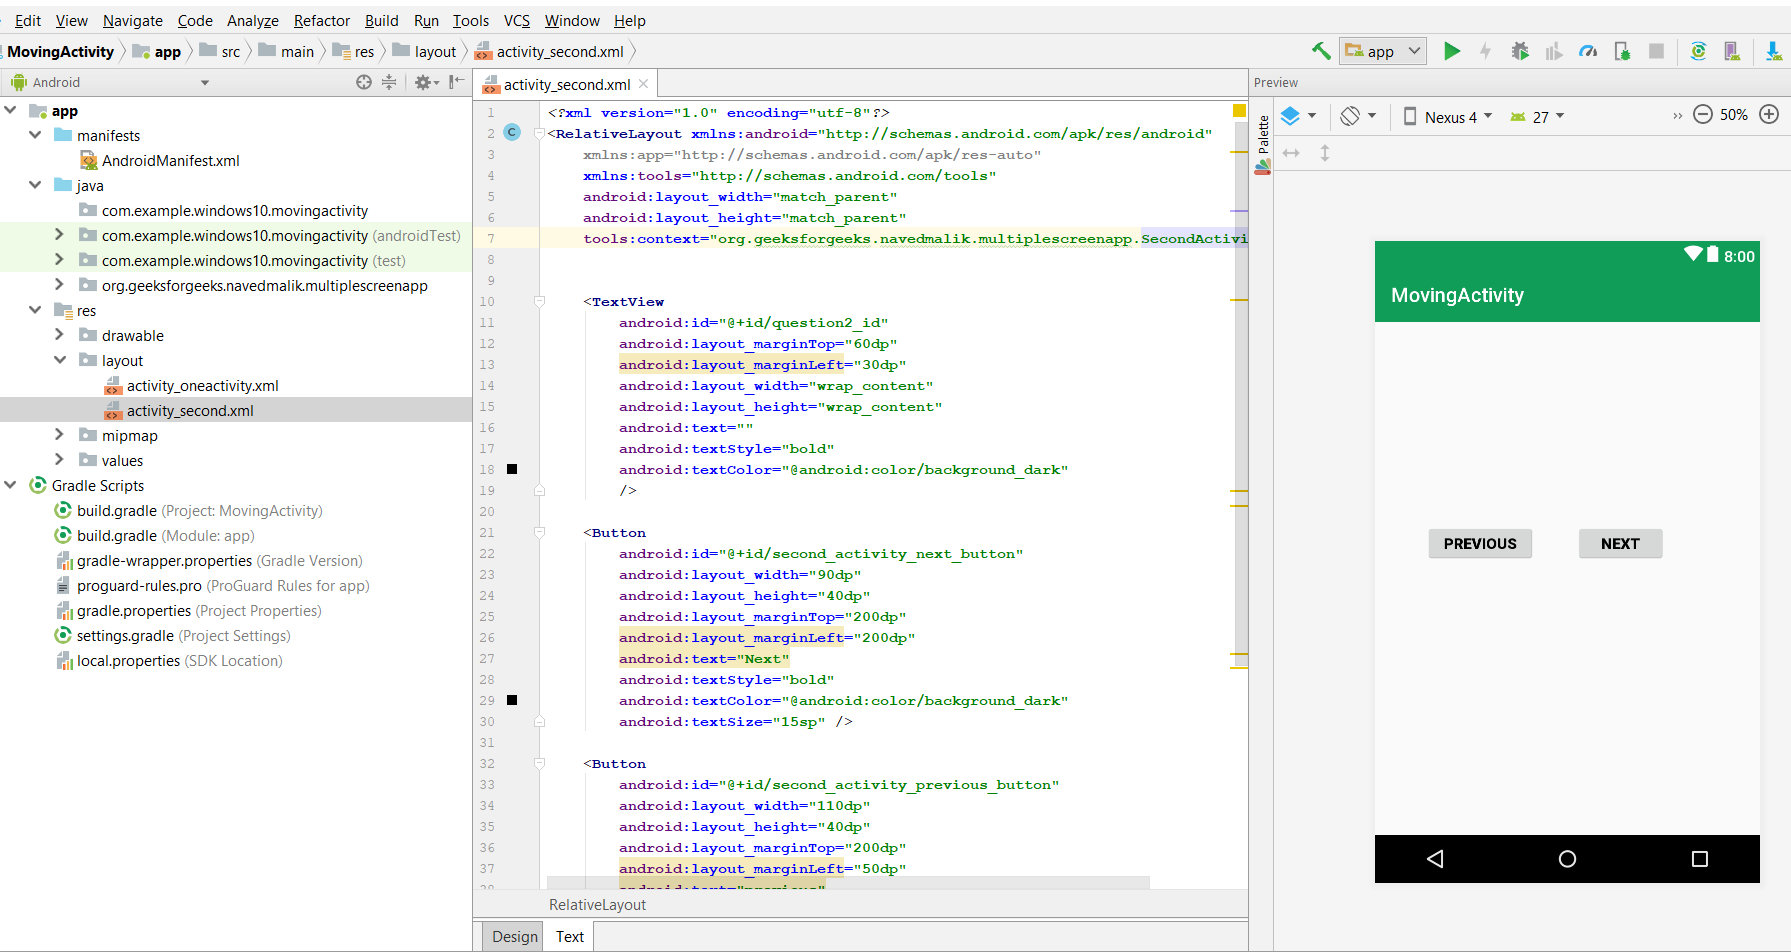
Теперь нам нужно создать третье действие, такое же, как второе действие, и путь к этому файлу такой же, как и у другого.
«Теперь вы можете создавать множество подобных действий». Здесь мы добавляем TextView для сообщений и одну кнопку для перехода к предыдущей активности. Это будет показано ниже
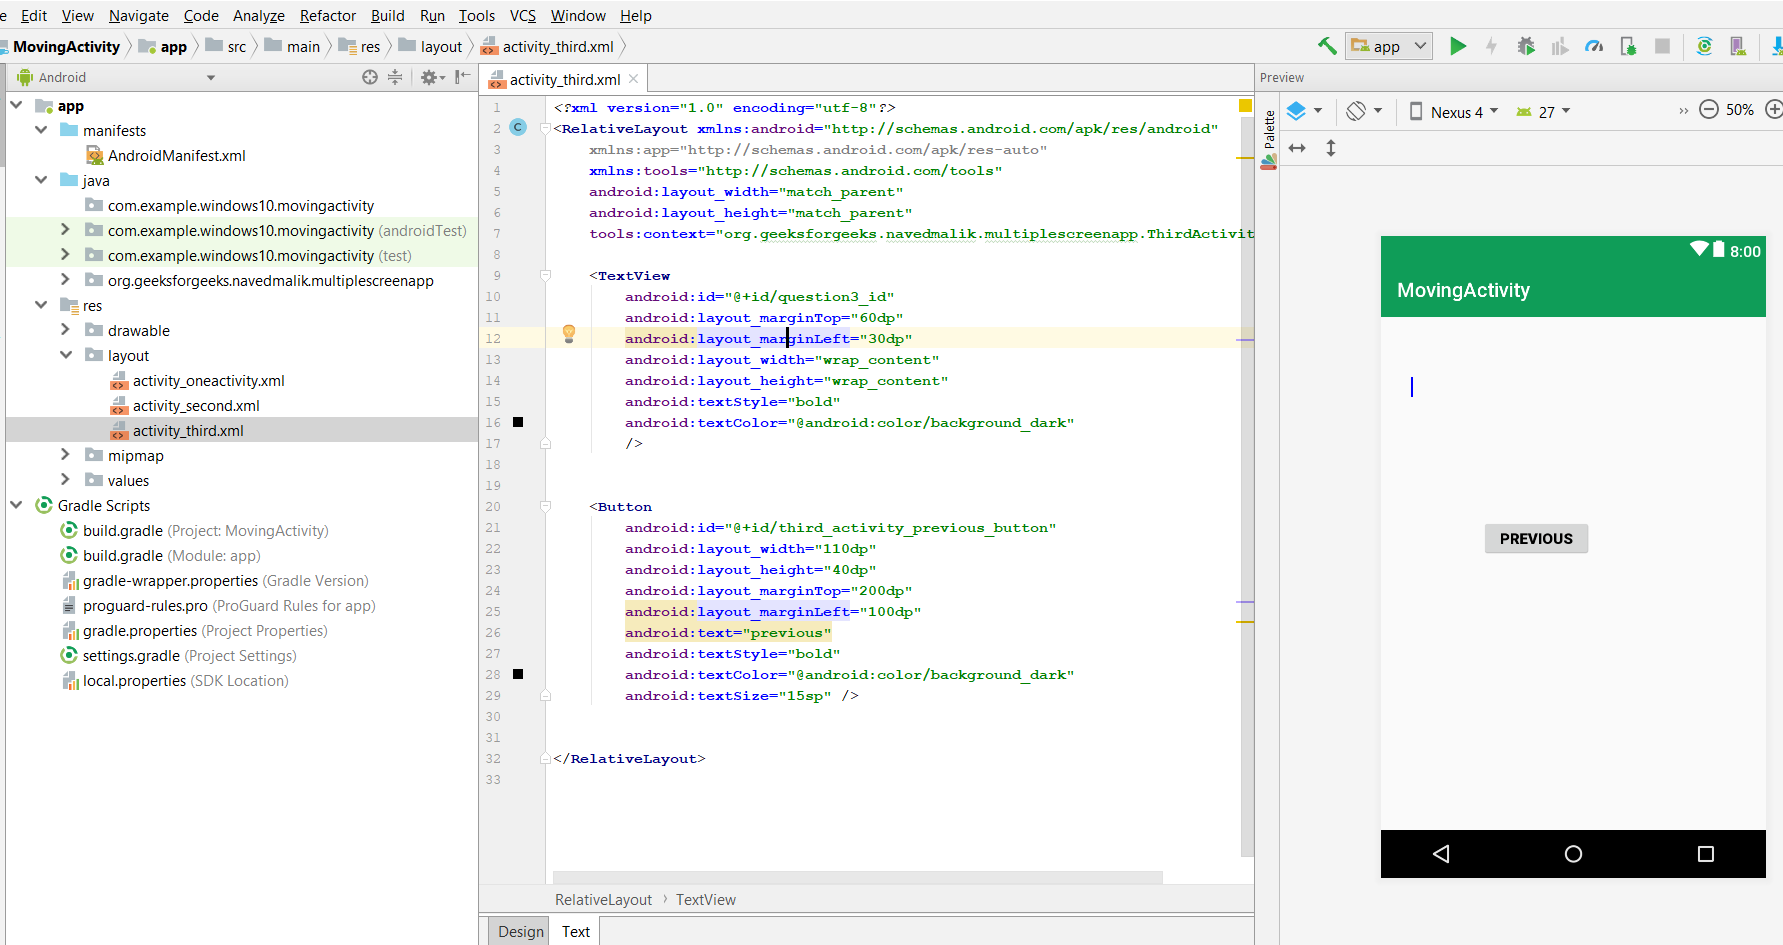
Шаг 4: Работа с файлами ActivityThree Kotlin/Java/XML
Далее перейдите к файлу activity_main.xml , представляющему UI проекта. Ниже приведен код файла activity_main.xml . Комментарии добавляются внутри кода, чтобы понять код более подробно.