Как установить размер кнопки в C #?
Кнопка - это неотъемлемая часть приложения, программного обеспечения или веб-страницы. Это позволяет пользователю взаимодействовать с приложением или программным обеспечением. В формах Windows вы можете установить размер кнопки автоматически, используя свойство AutoSize кнопки.
Он предоставляется классом Button, который помогает программистам создавать кнопку, размер которой увеличивается или уменьшается в зависимости от содержимого, которое она содержит. Если вы хотите автоматически изменять размер кнопки в соответствии с ее содержимым, установите для этого свойства значение true . А если вы хотите изменить размер кнопки вручную, установите для этого свойства значение false. Вы можете использовать это свойство двумя разными способами:
1. Design-Time: It is the easiest method to resize the button automatically. Using the following steps you will set the AutoSize property of the button:
- Step 1: Create a windows form as shown in the below image:
Visual Studio -> File -> New -> Project -> WindowsFormApp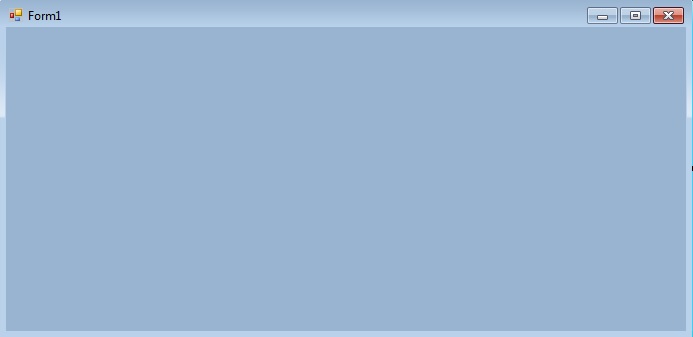
- Step 2: Drag the Button control from the ToolBox and drop it on the windows form. You are allowed to place a Button control anywhere on the windows form according to your need.

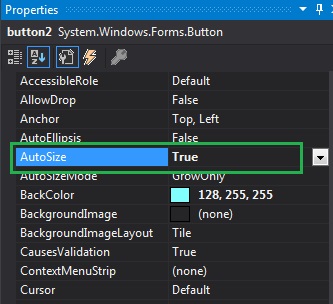
- Step 3: After drag and drop you will go to the properties of the Button control to set the AutoSize property of the Button.
Output:
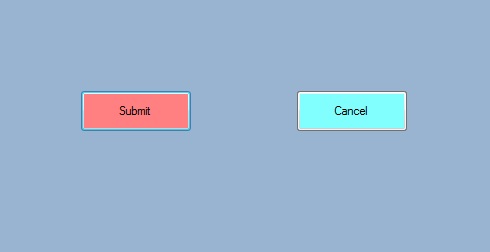
2. Run-Time: It is a little bit trickier than the above method. In this method, you can set the AutoSize property of the Button programmatically with the help of given syntax:
public override bool AutoSize { get; set; }The value of this property is of System.Boolean type. Following steps are used to set the AutoSize property of the Button:
- Step 1: Create a button using the Button() constructor is provided by the Button class.
// Creating Button using Button class
Button MyButton = new Button();
- Step 2: After creating Button, set the AutoSize property of the Button provided by the Button class.
// Set the AutoSize property of the button
Mybutton.AutoSize = true;
- Step 3: And last add this button control to from using Add() method.
// Add this Button to form
this.Controls.Add(Mybutton);
Example:
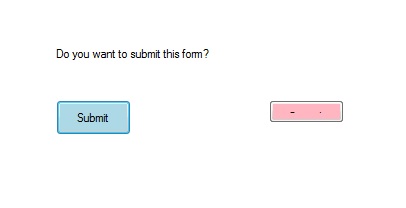
usingSystem;usingSystem.Collections.Generic;usingSystem.ComponentModel;usingSystem.Data;usingSystem.Drawing;usingSystem.Linq;usingSystem.Text;usingSystem.Threading.Tasks;usingSystem.Windows.Forms;namespaceWindowsFormsApp8 {publicpartialclassForm1 : Form {publicForm1(){InitializeComponent();}privatevoidForm1_Load(objectsender, EventArgs e){// Creating and setting the properties of labelLabel l =newLabel();l.AutoSize =true;l.Text ="Do you want to submit this form?";l.Location =newPoint(222, 145);// Adding this label to formthis.Controls.Add(l);// Creating and setting the properties of ButtonButton Mybutton =newButton();Mybutton.Location =newPoint(225, 198);Mybutton.Text ="Submit";Mybutton.AutoSize =true;Mybutton.BackColor = Color.LightBlue;Mybutton.Padding =newPadding(6);// Adding this button to formthis.Controls.Add(Mybutton);// Creating and setting the properties of ButtonButton Mybutton1 =newButton();Mybutton1.Location =newPoint(438, 198);Mybutton1.Text ="Cancel";Mybutton1.AutoSize =false;Mybutton1.BackColor = Color.LightPink;Mybutton1.Padding =newPadding(6);// Adding this button to formthis.Controls.Add(Mybutton1);}}}Output:
Before setting the AutoSize property of the cancel button to false the output is like this: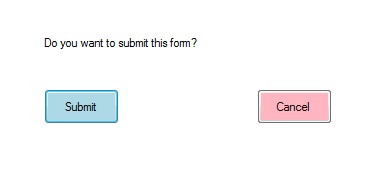
After setting the AutoSize property of the cancel button to false the output is like this:
