JavaFX | Кнопка с примерами
Класс кнопки является частью пакета JavaFX и может содержать текст, графику или и то, и другое.
Кнопка в JavaFX может быть трех разных типов:
- Обычная кнопка: обычная кнопка
- Кнопка по умолчанию: кнопка по умолчанию, которая получает нажатие клавиатуры VK_ENTER.
- Кнопка отмены: кнопка отмены, которая получает нажатие клавиатуры VK_ENTER.
При нажатии кнопки отправляется событие действия. Этим событием действия можно управлять с помощью EventHandler. Кнопки также могут реагировать на события мыши, реализуя EventHandler для обработки MouseEvent.
Конструкторами класса Button являются :
- Button () : создает кнопку с пустой строкой в качестве метки.
- Кнопка (String t) : создает кнопку с указанным текстом в качестве метки.
- Кнопка (String t, Node g) : создает кнопку с указанным текстом и значком для ее метки.
Обычно используемые методы :
| метод | объяснение |
|---|---|
| setCancelButton (логическое значение v) | Устанавливает значение свойства cancelButton. |
| setDefaultButton (логическое значение v) | Устанавливает значение свойства defaultButton |
| isDefaultButton () | Получает значение свойства defaultButton. |
| isCancelButton () | Получает значение свойства cancelButton. |
| cancelButtonProperty () | Кнопка отмены - это кнопка, на которую нажимается клавиатура VK_ESC. |
| defaultButtonProperty () | Кнопка по умолчанию - это кнопка, на которую с клавиатуры нажимается VK_ENTER. |
| createDefaultSkin () | Создайте новый экземпляр обложки по умолчанию для этого элемента управления. |
Below programs illustrate the use of Button in JavaFX.
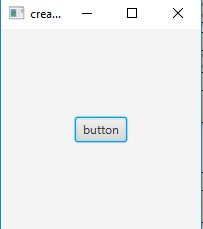
- Program to create a button and add it to the stage: This program creates a Button indicated by the name b. The button will be created inside a scene, which in turn will be hosted inside a stage. The function setTitle() is used to provide title to the stage. Then a tile pane is created, on which addChildren() method is called to attach the button inside the scene. Finally, the show() method is called to display the final results.
// Java Program to create a button and add it to the stageimportjavafx.application.Application;importjavafx.scene.Scene;importjavafx.scene.control.Button;importjavafx.scene.layout.StackPane;importjavafx.stage.Stage;publicclassbuttonextendsApplication {// launch the applicationpublicvoidstart(Stage s){// set title for the stages.setTitle("creating buttons");// create a buttonButton b =newButton("button");// create a stack paneStackPane r =newStackPane();// add buttonr.getChildren().add(b);// create a sceneScene sc =newScene(r,200,200);// set the scenes.setScene(sc);s.show();}publicstaticvoidmain(String args[]){// launch the applicationlaunch(args);}}Output:
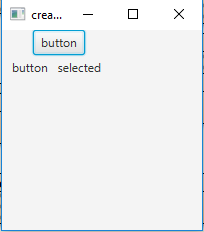
- Java program to create a button and add event handler to it: This program creates a Button indicated by the name b. The button will be created inside a scene, which in turn will be hosted inside a stage. We would create a label to show if the button is pressed or not. The function setTitle() is used to provide title to the stage. Then a tile pane is created, on which addChildren() method is called to attach the button and label inside the scene. Finally, the show() method is called to display the final results.we would create an event handler to handle the button events. The event handler would be added to the button using setOnAction() function.
// Java program to create a button and add event handler to itimportjavafx.application.Application;importjavafx.scene.Scene;importjavafx.scene.control.Button;importjavafx.scene.layout.*;importjavafx.event.ActionEvent;importjavafx.event.EventHandler;importjavafx.scene.control.Label;importjavafx.stage.Stage;publicclassbutton_1extendsApplication {// launch the applicationpublicvoidstart(Stage s){// set title for the stages.setTitle("creating buttons");// create a buttonButton b =newButton("button");// create a stack paneTilePane r =newTilePane();// create a labelLabel l =newLabel("button not selected");// action eventEventHandler<ActionEvent> event =newEventHandler<ActionEvent>() {publicvoidhandle(ActionEvent e){l.setText(" button selected ");}};// when button is pressedb.setOnAction(event);// add buttonr.getChildren().add(b);r.getChildren().add(l);// create a sceneScene sc =newScene(r,200,200);// set the scenes.setScene(sc);s.show();}publicstaticvoidmain(String args[]){// launch the applicationlaunch(args);}}Output:
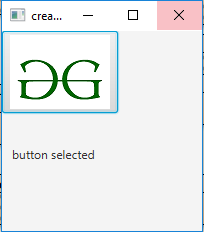
- Java Program to create a button with a image and add event handler to it: This program creates a Button with an image on it indicated by the name b. The image will be included using the File Input Stream that imports the image. we will then create an image using the object of file input stream and then create an image view using the image file. The button will be created inside a scene, which in turn will be hosted inside a stage.we would create a label to show if the button is pressed or not. The function setTitle() is used to provide title to the stage. Then a tile pane is created, on which addChildren() method is called to attach the button and label inside the scene. Finally, the show() method is called to display the final results.we would create an event handler to handle the button events. The event handler would be added to the button using setOnAction() function.
// Java Program to create a button with a image and// add event handler to itimportjavafx.application.Application;importjavafx.scene.Scene;importjavafx.scene.control.Button;importjavafx.scene.layout.*;importjavafx.scene.image.*;importjava.io.*;importjavafx.event.ActionEvent;importjavafx.event.EventHandler;importjavafx.scene.control.Label;importjavafx.stage.Stage;importjava.net.*;publicclassbutton_2extendsApplication {// launch the applicationpublicvoidstart(Stage s)throwsException{// set title for the stages.setTitle("creating buttons");// create a input streamFileInputStream input =newFileInputStream("f:\gfg.png");// create a imageImage i =newImage(input);// create a image ViewImageView iw =newImageView(i);// create a buttonButton b =newButton("", iw);// create a stack paneTilePane r =newTilePane();// create a labelLabel l =newLabel("button not selected");// action eventEventHandler<ActionEvent> event =newEventHandler<ActionEvent>() {publicvoidhandle(ActionEvent e){l.setText("button selected ");}};// when button is pressedb.setOnAction(event);// add buttonr.getChildren().add(b);r.getChildren().add(l);// create a sceneScene sc =newScene(r,200,200);// set the scenes.setScene(sc);s.show();}publicstaticvoidmain(String args[]){// launch the applicationlaunch(args);}}Output
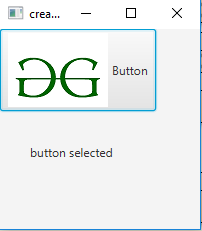
- Java Program to create a button with a image and text and add event handler to it
This program creates a Button with an image and a text on it indicated by the name b. The image will be included using the File Input Stream that imports the image. we will then create an image using the object of file input stream and then create an image view using the image file.The button will be created inside a scene, which in turn will be hosted inside a stage.we would create a label to show if the button is pressed or not. The function setTitle() is used to provide title to the stage. Then a tile pane is created, on which addChildren() method is called to attach the button and label inside the scene. Finally, the show() method is called to display the final results.we would create an event handler to handle the button events. The event handler would be added to the button using setOnAction() function.
// Java Program to create a button with a image// and text and add event handler to itimportjavafx.application.Application;importjavafx.scene.Scene;importjavafx.scene.control.Button;importjavafx.scene.layout.*;importjavafx.scene.image.*;importjava.io.*;importjavafx.event.ActionEvent;importjavafx.event.EventHandler;importjavafx.scene.control.Label;importjavafx.stage.Stage;importjava.net.*;publicclassbutton_3extendsApplication {// launch the applicationpublicvoidstart(Stage s)throwsException{// set title for the stages.setTitle("creating buttons");// create a input streamFileInputStream input =newFileInputStream("f:\gfg.png");// create a imageImage i =newImage(input);// create a image ViewImageView iw =newImageView(i);// create a buttonButton b =newButton("Button", iw);// create a stack paneTilePane r =newTilePane();// create a labelLabel l =newLabel("button not selected");// action eventEventHandler<ActionEvent> event =newEventHandler<ActionEvent>() {publicvoidhandle(ActionEvent e){l.setText("button selected ");}};// when button is pressedb.setOnAction(event);// add buttonr.getChildren().add(b);r.getChildren().add(l);// create a sceneScene sc =newScene(r,200,200);// set the scenes.setScene(sc);s.show();}publicstaticvoidmain(String args[]){// launch the applicationlaunch(args);}}Output:
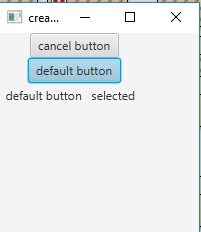
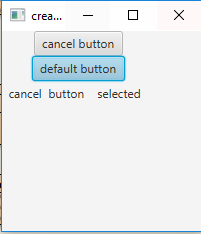
- Java program to create a default button and a cancel button: This program creates a Button indicated by the name b and b1 . The button b will act as a cancel button which will respond to the escape keypress of keyboard and button b1 will behave as a default button which will respond to enter keypress of the keyboard). The button will be created inside a scene, which in turn will be hosted inside a stage.we would create a label to show which button is pressed. The function setTitle() is used to provide title to the stage. Then a tile pane is created, on which addChildren() method is called to attach the button and label inside the scene. Finally, the show() method is called to display the final results.we would create an event handler to handle the button events. The event handler would be added to the button using setOnAction() function.
// Java program to create a default button and a// cancel button and add event handler to itimportjavafx.application.Application;importjavafx.scene.Scene;importjavafx.scene.control.Button;importjavafx.scene.layout.*;importjavafx.event.ActionEvent;importjavafx.event.EventHandler;importjavafx.scene.control.Label;importjavafx.stage.Stage;publicclassbutton_4extendsApplication {// launch the applicationpublicvoidstart(Stage s){// set title for the stages.setTitle("creating buttons");// create a buttonButton b =newButton("cancel button");// set cancel buttonb.setCancelButton(true);// create a buttonButton b1 =newButton("default button");// set default buttonb1.setDefaultButton(true);// create a stack paneTilePane r =newTilePane();// create a labelLabel l =newLabel("button not selected");// action eventEventHandler<ActionEvent> event =newEventHandler<ActionEvent>() {publicvoidhandle(ActionEvent e){l.setText(" cancel button selected ");}};EventHandler<ActionEvent> event1 =newEventHandler<ActionEvent>() {publicvoidhandle(ActionEvent e){l.setText(" default button selected ");}};// when button is pressedb.setOnAction(event);b1.setOnAction(event1);// add buttonr.getChildren().add(b);r.getChildren().add(b1);r.getChildren().add(l);// create a sceneScene sc =newScene(r,200,200);// set the scenes.setScene(sc);s.show();}publicstaticvoidmain(String args[]){// launch the applicationlaunch(args);}}Output:
Note: The above programs might not run in an online IDE please use an offline compiler.
Reference: https://docs.oracle.com/javase/8/javafx/api/javafx/scene/control/Button.html
Attention reader! Don’t stop learning now. Get hold of all the important Java Foundation and Collections concepts with the Fundamentals of Java and Java Collections Course at a student-friendly price and become industry ready. To complete your preparation from learning a language to DS Algo and many more, please refer Complete Interview Preparation Course.