include - Теги шаблона Django
A Django template is a text document or a Python string marked-up using the Django template language. Django being a powerful Batteries included framework provides convenience to rendering data in a template. Django templates not only allow passing data from view to template, but also provides some limited features of programming such as variables, for loops, comments, extends, include etc.
This article revolves about how to use include tag in Templates. include tag loads a template and renders it with the current context. This is a way of “including” other templates within a template. The template name can either be a variable or a hard-coded (quoted) string, in either single or double quotes.
Syntax
{% include "template_name.html" %}
Example
{% include "foo/bar.html" %}Normally the template name is relative to the template loader’s root directory. A string argument may also be a relative path starting with ./ or ../ as described in the extends tag.
include – Django template Tags Explanation
Illustration of How to use include tag in Django templates using an Example. Consider a project named geeksforgeeks having an app named geeks.
Refer to the following articles to check how to create a project and an app in Django.
- How to Create a Basic Project using MVT in Django?
- How to Create an App in Django ?
Now create a view through which we will access the template,
In geeks/views.py,
# import Http Response from djangofrom django.shortcuts import render # create a functiondef geeks_view(request): # return response return render(request, "geeks.html.html") |
Create a url path to map to this view. In geeks/urls.py,
from django.urls import path # importing views from views.pyfrom .views import geeks_view urlpatterns = [ path("", geeks_view),] |
Now we will create three templates to demonstrate include tag. Create a base template in geeks.html,
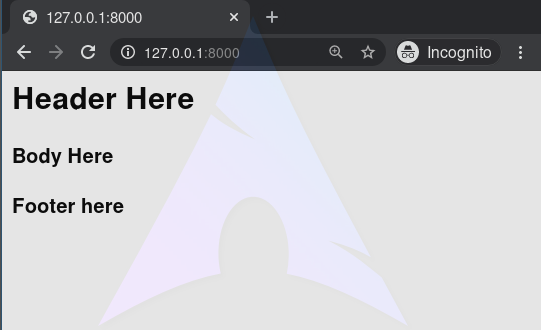
<html> <!-- Include header --> {% include "component1.html" %} <h4>Body Here</h4> <!-- Include Footer --> {% include "component2.html" %}</html> |
Create two components in templates/component1.html
<!-- component1.html --><h2> Header Here </h2>> |
and templates/component2.html
<!-- component2.html --><h4>Footer here</h4> |
Now visit http://127.0.0.1:8000/,

Advanced Usage
one can pass additional context to the template using keyword arguments:
{% include "name_snippet.html" with person="Jane" greeting="Hello" %}Attention geek! Strengthen your foundations with the Python Programming Foundation Course and learn the basics.
To begin with, your interview preparations Enhance your Data Structures concepts with the Python DS Course. And to begin with your Machine Learning Journey, join the Machine Learning – Basic Level Course