Форма обратной связи с использованием Pugjs, Node.js, MongoDB, Express
Мы можем создать форму обратной связи, используя PugJs, NodeJS, MongoDB, Express, выполнив следующие действия. Форма обратной связи принимает ввод от пользователя и отправляет данные на сервер для их обработки и сохранения в базе данных.
Шаг 1: Создайте папку с именем Feedback_form в любом каталоге. Вы можете взять любое имя.
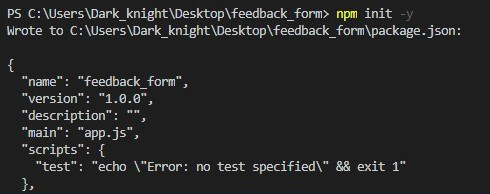
Шаг 2: Инициализируйте проект NodeJS с помощью следующей команды.
npm init –y
Шаг 3: Установите необходимые модули, используя следующую команду из вашего терминала/cmd.
// Express middleware
npm install express  --save

// Database setup
npm install mongoose  --save

// pugjs for client site rendering
npm install pug  --save

// OR you can install all command
// using single command
npm install express pug mongoose
Шаг 4: Структура каталога будет выглядеть следующим образом.
- node_modules: содержит все наши установленные модули узлов.
- static: содержит статические файлы для вашего сервера.
- views: он содержит файлы PugJS для отображения на клиентском сайте.
- app.js: содержит серверный код для запуска этого приложения.
Шаг 5: После установки модулей запишите следующие коды, чтобы создать форму обратной связи.
Имя файла: app.js
Javascript
// Require express to make easy// routing on server side.const express = require("express"); // Creating express objectconst app = express(); // Require path moduleconst path = require("path"); // Require pug template engineconst pug = require("pug"); // Require mongoose to use mongoDb// in a easier wayconst mongoose = require("mongoose"); // Define a port numberconst port = 3000; // Make a static route to use your// static files in client sideapp.use("/static", express.static("static")); // Middleware for parsingapp.use(express.urlencoded()); // Define and use pug engine so also// declare path on renderingapp.set("view engine", "pug");app.set("views", path.join(__dirname, "views")); // Database Connection mongoose.connect( { useUnifiedTopology: true }); // Create schemaconst feedSchecma = mongoose.Schema({ name: String, email: String, feed: String}); // Making a modal on our already// defined schemaconst feedModal = mongoose .model("feeds", feedSchecma); // Handling get requestapp.get("/", function (req, res) { // Rendering your form res.render("feedback_form");}); // Handling data after submission of formapp.post("/feedback_form", function (req, res) { const feedData = new feedModal({ name: req.body.name, email: req.body.email, feed: req.body.feedback }); feedData.save() .then(data => { res.render("feedback_form",{ msg: "Your feedback successfully saved." }); }) .catch(err => { res.render("feedback_form", { msg: "Check Details." }); });}) // Server setupapp.listen(port, () => { console.log("server is running");}); |
Имя файла: feedback_form.pug
html
<!DOCTYPE html>html(lang="en") head meta(charset="UTF-8") meta(name="viewport", content= "width=device-width, initial-scale=1.0") title Feedback Form //- we are directly use static files because // already use static serve link(rel="stylesheet", href="/static/style.css") body .form h2 Feedback Form if(msg) small=msg //- feedback_form POST route form(action="/feedback_form",method="POST") label(for="name") Enter Your Name input#name(type="text", name="name") label(for="email") Enter Your Email input#email(type="email", name="email") label(for="feedback") Enter Your Feedback textarea#feedback( name="feedback", cols="30", rows="5" ) button(type="submit") Submit |
Имя файла: style.css
CSS
* { margin: 0; padding:0; font-family: system-ui;} body { display: flex; justify-content: center; align-items: center; height: 100vh;} .form { display: flex; flex-direction: column; justify-content: center; align-items: center; background: white; padding: 1rem; box-shadow: 0px 0px 6px 0px #808080b3; border-radius: 10px;} .form form { display: flex; flex-direction: column; justify-content: center;} .form form input, .form form textarea { border: 1px solid gray; border-radius: 5px; padding: 5px 10px; font-size: 20px; outline: none;} .form form label { margin-top: 7px;} .form button { margin-top: 10px; padding: 4px 10px; font-size: 1rem; border: 1px solid gray; border-radius: 7px; outline: none; cursor: pointer;} |
Шаг 6: Запустите файл app.js с помощью следующей команды:
node app.js
Предварительный просмотр дизайна:
Заполненная форма:
После отправки:
Команды MongoDB: Используйте эту команду, чтобы просмотреть записи вашей базы данных:
mongo // Start mongo shell
show dbs // See database cluster
use feedback // Use table name
show collections // See collections in cluster
db.feeds.find() // See records with table name
Выход: