Createview - представления на основе классов Django
Создание представления относится к представлению (логике) для создания экземпляра таблицы в базе данных. Мы уже обсудили основы создания представления в режиме создания представления - представления на основе функций Django. Представления на основе классов предоставляют альтернативный способ реализации представлений как объектов Python вместо функций. Они не заменяют функциональные представления, но имеют определенные отличия и преимущества по сравнению с функциональными представлениями:
- Организация кода, связанного с конкретными методами HTTP (GET, POST и т. Д.), Может быть решена отдельными методами вместо условного перехода.
- Объектно-ориентированные методы, такие как миксины (множественное наследование), могут использоваться для разделения кода на повторно используемые компоненты.
Представлениями на основе классов проще и эффективнее управлять, чем представлениями на основе функций. Представление на основе функций с множеством строк кода может быть преобразовано в представления на основе классов всего несколькими строками. Именно здесь вступает в силу объектно-ориентированное программирование.
Django Create View - представления на основе классов
Illustration of How to create and use create view using an Example. Consider a project named geeksforgeeks having an app named geeks.
Refer to the following articles to check how to create a project and an app in Django.
- How to Create a Basic Project using MVT in Django?
- How to Create an App in Django ?
After you have a project and an app, let’s create a model of which we will be creating instances through our view. In geeks/models.py,
# import the standard Django Model# from built-in libraryfrom django.db import models # declare a new model with a name "GeeksModel"class GeeksModel(models.Model): # fields of the model title = models.CharField(max_length = 200) description = models.TextField() # renames the instances of the model # with their title name def __str__(self): return self.title |
After creating this model, we need to run two commands in order to create Database for the same.
Python manage.py makemigrations
Python manage.py migrate
Class Based Views automatically setup everything from A to Z. One just needs to specify which model to create Create View for and the fields. Then Class based CreateView will automatically try to find a template in app_name/modelname_form.html. In our case it is geeks/templates/geeks/geeksmodel_form.html. Let’s create our class based view. In geeks/views.py,
from django.views.generic.edit import CreateViewfrom .models import GeeksModel class GeeksCreate(CreateView): # specify the model for create view model = GeeksModel # specify the fields to be displayed fields = ["title", "description"] |
Now create a url path to map the view. In geeks/urls.py,
from django.urls import path # importing views from views..pyfrom .views import GeeksCreateurlpatterns = [ path("", GeeksCreate.as_view() ),] |
Create a template in templates/geeks/geeksmodel_form.html,
<form method="POST" enctype="multipart/form-data"> <!-- Security token --> {% csrf_token %} <!-- Using the formset --> {{ form.as_p }} <input type="submit" value="Submit"></form> |
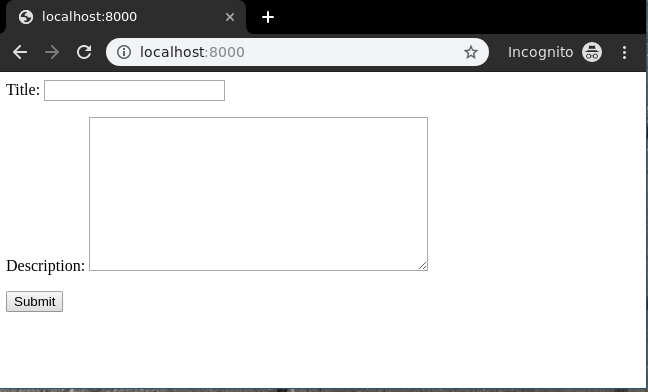
Let’s check what is there on http://localhost:8000/
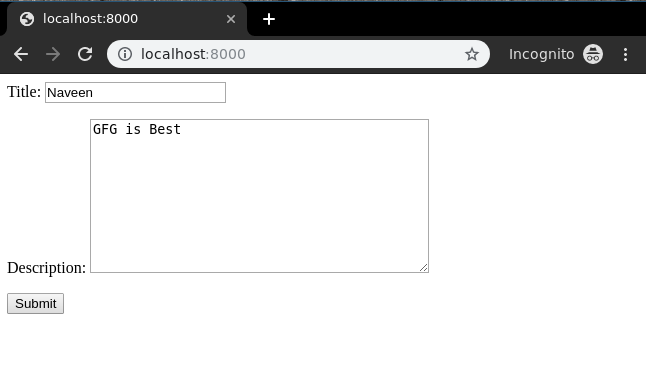
Now let’s try to enter data in this form,
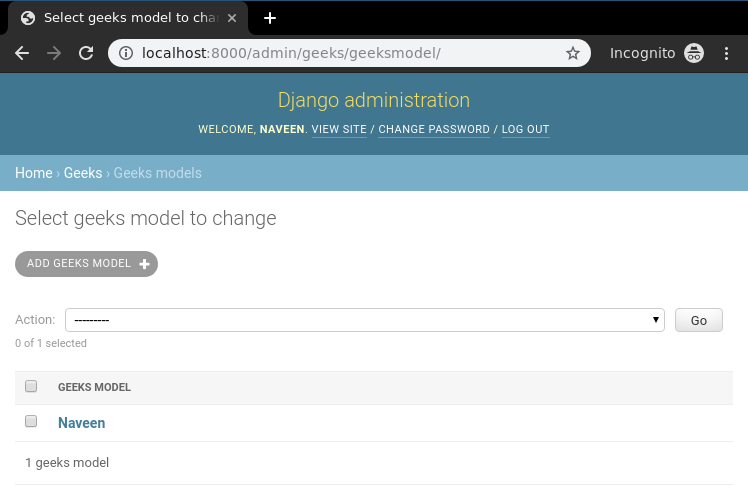
Bingo.! Create view is working and we can verify it using the instance created through the admin panel.
This way one can create create view for a model in Django.
Attention geek! Strengthen your foundations with the Python Programming Foundation Course and learn the basics.
To begin with, your interview preparations Enhance your Data Structures concepts with the Python DS Course. And to begin with your Machine Learning Journey, join the Machine Learning – Basic Level Course