Как создавать списки и ссылки с помощью jQuery EasyUI Mobile?
В этой статье мы узнаем, как создавать списки, группировать их и создавать ссылки для удобной навигации с помощью jQuery EasyUI Mobile.
EasyUI - это платформа HTML5 для использования компонентов пользовательского интерфейса на основе технологий jQuery, React, Angular и Vue. Это помогает создавать функции для интерактивных веб-приложений и мобильных приложений, экономя много времени для разработчиков.
Загрузки EasyUI для jQuery:
https://www.jeasyui.com/download/index.php
Пожалуйста, позаботьтесь о путях к файлам предварительно скомпилированной библиотеки во время реализации.
Пример 1. В следующем примере демонстрируются списки и создание ссылок с помощью кнопок с помощью jQuery EasyUI Mobile .
html
<!DOCTYPE html><html> <head> <meta charset="UTF-8"> <meta name="viewport" content="initial-scale=1.0, maximum-scale=1.0, user-scalable=no"> <!-- EasyUI specific stylesheets--> <link rel="stylesheet" type="text/css" href="themes/metro/easyui.css"> <link rel="stylesheet" type="text/css" href="themes/mobile.css"> <link rel="stylesheet" type="text/css" href="themes/icon.css"> <!--jQuery library --> <script type="text/javascript" src="jquery.min.js"> </script> <!--jQuery libraries of EasyUI --> <script type="text/javascript" src="jquery.easyui.min.js"> </script> <!--jQuery libraries of EasyUI Mobile--> <script type="text/javascript" src="jquery.easyui.mobile.js"> </script></head> <body> <!--"easyui-navpanel" class is used for nav panel--> <div class="easyui-navpanel"> <header> <div class="m-toolbar"> <span class="m-title">List Button</span> </div> </header> <!--"m-list" class is used for simple list--> <ul class="m-list"> <li>C <div class="m-right"> <a href= class="easyui-linkbutton"> Add </a> </div> </li> <li>C++ <div class="m-right"> <a href= class="easyui-linkbutton"> Add </a> </div> </li> <li>Java <div class="m-right"> <a href= class="easyui-linkbutton"> Add </a> </div> </li> <li>Python <div class="m-right"> <a href= class="easyui-linkbutton"> Add </a> </div> </li> </ul> </div></body> </html> |
Выход:
- Перед выполнением:
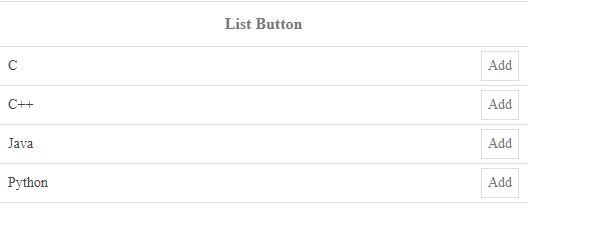
После выполнения:
Пример 2: В следующем примере демонстрируется группировка списков с использованием указанного выше плагина.
html
<!DOCTYPE html>< html > < head > < meta charset = "UTF-8" > < meta name = "viewport" content=" initial-scale = 1 .0, maximum-scale = 1 .0, user-scalable = no "> <!-- EasyUI specific stylesheets--> < link rel = "stylesheet" type = "text/css" href = "themes/metro/easyui.css" > < link rel = "stylesheet" type = "text/css" href = "themes/mobile.css" > < link rel = "stylesheet" type = "text/css" href = "themes/icon.css" > <!--jQuery library --> < script type = "text/javascript" src = "jquery.min.js" > </ script > <!--jQuery libraries of EasyUI --> < script type = "text/javascript" src = "jquery.easyui.min.js" > </ script > <!--jQuery libraries of EasyUI Mobile--> < script type = "text/javascript" src = "jquery.easyui.mobile.js" > </ script ></ head > < body > <!--'easyui-navpanel' class for navigation panel--> < div class = "easyui-navpanel" > < header > < div class = "m-toolbar" > < span class = "m-title" > List group and link lists </ span > </ div > </ header > <!--'m-list' class is used for simple lists --> < ul class = "m-list" > <!--'m-list-group' class is used to group lists --> < li class = "m-list-group" >Algorithms</ li > < li > < a href = onclick = "display(this)" > Analysis of algorithms </ a > </ li > < li > < a href = onclick = "display(this)" > Searching algorithms </ a > </ li > < li > < a href = onclick = "display(this)" > Geometric algorithms </ a > </ li > < li >< a href = onclick = "display(this)" > Greedy algorithms </ a > </ li > < li class = "m-list-group" > Web Technologies </ li > < li >< a href = "" onclick = "display(this)" > HTML</ a > </ li > < li > < a href = onclick = "display(this)" > Javascript </ a > </ li > </ ul > </ div > < div id = "divID2" class = "easyui-navpanel" > < header > < div class = "m-toolbar" > < span id = "panel2-title" class = "m-title" > Details </ span > < div class = "m-left" > <!--'m-back' class is used for going back--> < a href = "javascript:void(0)" class = "easyui-linkbutton m-back" plain = "true" outline = "true" onclick = "$.mobile.back()" > Back </ a > </ div > </ div > </ header > < div style = "margin:50px 0 0;text-align:center" > < a href = "javascript:void(0)" class = "easyui-linkbutton" style = "width:100px;height:30px" onclick = "$.mobile.back()" > Go Back </ a > </ div > </ div > < script type = "text/javascript" > function display(target) { var link = $(target).text(); $('#panel2-title').html(link); $.mobile.go('#divID2'); } </ script ></ body > </ html > |
Выход:
- Перед выполнением:
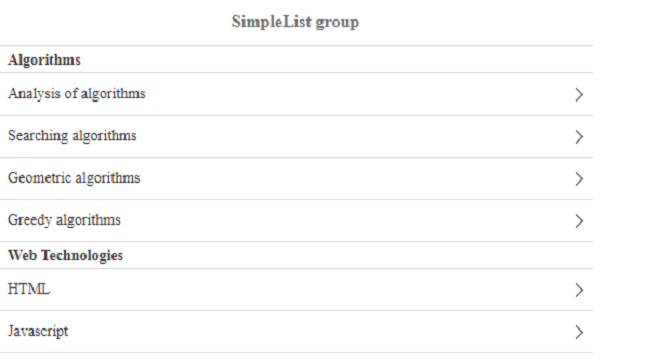
- После выполнения:
Пример 3: В следующем примере демонстрируются простые списки с изображениями с использованием указанного выше плагина.
html
<!DOCTYPE html>< html > < head > < meta charset = "UTF-8" > < meta name = "viewport" content=" initial-scale = 1 .0, maximum-scale = 1 .0, user-scalable = no "> <!-- EasyUI specific stylesheets--> < link rel = "stylesheet" type = "text/css" href = "themes/metro/easyui.css" > < link rel = "stylesheet" type = "text/css" href = "themes/mobile.css" > < link rel = "stylesheet" type = "text/css" href = "themes/icon.css" > <!--jQuery library --> < script type = "text/javascript" src = "jquery.min.js" > </ script > <!--jQuery libraries of EasyUI --> < script type = "text/javascript" src = "jquery.easyui.min.js" > </ script > <!--jQuery libraries of EasyUI Mobile--> < script type = "text/javascript" src = "jquery.easyui.mobile.js" > </ script > < style > #listID .list-image { float: left; width: 32px; height: 32px; border: 0; margin-right: 5px; } #listID .list-header { font-size: 14px; font-weight: bold; } #listID .list-content { text-overflow: ellipsis; overflow: hidden; } </ style ></ head > < body > <!--'easyui-navpanel' class for navigation panel--> < div class = "easyui-navpanel" > < header > < div class = "m-toolbar" > < span class = "m-title" > Images for simple lists </ span > </ div > </ header > <!--'m-list' class is used --> < ul id = "listID" class = "m-list" > < li > <!--'list-image' class is used --> < img class = "list-image" src = "images/html.png" /> <!--'list-header' class is used for heading--> < div class = "list-header" >HTML</ div > <!--'list-content' class for the list content--> < div class = "list-content" > HTML stands for HyperText Markup Language. It is used to design web pages. </ div > </ li > < li > < img class = "list-image" src = "images/php.png" /> < div class = "list-header" >PHP</ div > < div class = &
РЕКОМЕНДУЕМЫЕ СТАТЬИ |