Как использовать многорежимный плагин jtsage-datebox?
В этой статье мы научимся использовать плагин многорежимного выбора даты и времени для Bootstrap (3 и 4), jQueryMobile и Bulma. Плагин jQuery datebox полностью основан на технологиях JavaScript, HTML и CSS.
Вот некоторые ключевые особенности плагина:
- Он может ограничивать любые условия, такие как дата, время и продолжительность.
- Многие обратные вызовы и триггеры доступны для событий создания, открытия, закрытия, изменения, уничтожения.
- Инструмент предоставляет такие функции, как скользящие столбцы или недели.
Пожалуйста, скачайте необходимые предварительно скомпилированные файлы по ссылке и сохраните их в своей рабочей папке для внедрения.
Раздел заголовка HTML кода: Следующий фрагмент кода HTML содержит раздел заголовка, в котором есть все стандартные предварительно скомпилированные файлы, необходимые для выполнения всех следующих примеров.
Примечание. Включите в код все следующие ссылки на библиотеки с указанием правильных путей к файлам.
html
<head> <meta http-equiv="Content-Type" content="text/html; charset=utf-8" /> <meta name="viewport" content="width=device-width, initial-scale=1, maximum-scale=1"> integrity="sha256-hwg4gsxgFZhOsEEamdOYGBf13Fy QuiTwlAQgxVSNgt4=" crossorigin="anonymous"></script> <script type="text/javascript" src="../src/js/external/widgetLib.js"> </script> <script type="text/javascript" src="../src/js/baseObject.js"></script> <!-- Enhance JavaScript date object--> <script type="text/javascript" src="../src/js/lib/dateEnhance.js"></script> <!--Date / Time output --> <script type="text/javascript" src="../src/js/lib/dateFormatter.js"></script> <!--Limit functions --> <script type="text/javascript" src="../src/js/lib/dateLimit.js"></script> <!-- Date / Time input --> <script type="text/javascript" src="../src/js/lib/dateParser.js"></script> <!--Event loop --> <script type="text/javascript" src="../src/js/lib/eventHandler.js"></script> <!-- Date adjustments --> <script type="text/javascript" src="../src/js/lib/offset.js"></script> <!-- Public functions --> <script type="text/javascript" src="../src/js/lib/public.js"></script> <!-- Short utility functions --> <script type="text/javascript" src="../src/js/lib/shortUtil.js"></script> <script type="text/javascript" src="../src/js/lib/standardControls.js"></script> <!-- Create the widget --> <script type="text/javascript" src="../src/js/lib/widgetCreate.js"></script> <script type="text/javascript" src="../src/js/lib/widgetOpen.js"></script> <!-- Closing of the widget --> <script type="text/javascript" src="../src/js/lib/widgetClose.js"></script> <!-- Destroy, Enable & Disable the widget --> <script type="text/javascript" src="../src/js/lib/widgetDestroyEnableDisable.js"> </script> <!-- Handle positioning of the widget --> <script type="text/javascript" src="../src/js/lib/positioning.js"></script> <!-- Twitter Bootstrap v3.4.1 --> <script type="text/javascript" src="../src/js/framework/bootstrap.js"></script> <!-- DateBox, TimeBox, DateTimeBox, DurationBox --> <script type="text/javascript" src="../src/js/modes/datebox.js"></script> <!-- FlipBox, TimeFlipBox, DateTimeFlipBox, DurationFlipBox --> <script type="text/javascript" src="../src/js/modes/flipbox.js"></script> <!-- CalBox --> <script type="text/javascript" src="../src/js/modes/calbox.js"></script> <!-- SlideBox --> <script type="text/javascript" src="../src/js/modes/slidebox.js"></script> <!-- Used only in the test environment --> <script type="text/javascript" src="../src/js/widgetBinding.js"></script> <!-- Auto enhance for data-role on a page --> <script type="text/javascript" src="../src/js/autoInit.js"></script> <script type="text/javascript" i18n/jtsage-datebox.lang.utf8.js"> </script></head> |
Пример 1. Следующее средство выбора даты и времени демонстрирует Bootstrap 4. Не забудьте включить предварительно скомпилированные файлы Bootstrap (3 и 4) в свои коды Bootstrap, как показано ниже.
html
<!DOCTYPE html>< html lang = "en" >< head > < link rel = "stylesheet" 4.3.1/css/bootstrap.min.css"> popper.js/1.12.9/umd/popper.min.js"></ script > 4.3.1/js/bootstrap.min.js"></ script > < script type = "text/javascript" > jQuery.extend(jQuery.jtsage.datebox.prototype.options, { mode : "calbox", /* Display */ displayMode : "inline", lockInput: false, displayDropdownPosition : "bottomRight", useImmediate : true, useFocus : true, useButton : true, /* Callbacks */ beforeOpenCallbackArgs : [ "helloback call", "bye"], beforeOpenCallback : function(a, b) { console.log(a); console.log(b); return true; }, closeCallbackArgs : [ "hi close", "bye close"], closeCallback : function(a, b) { console.log(a); console.log(b); }, calDateList : [ ["1980-04-25", "JT's Date of Birth"], ["1809-02-12", "Lincoln's Birthday"] ], calShowDateList : true, slideDateList : [ ["1980-04-25", "JT's Date of Birth"], ["1809-02-12", "Lincoln's Birthday"] ], slideShowDateList : true, minHour : 9, maxHour : 5, minTime : "9:00", maxTime : "17:00", slideUsePickers : true, slideYearPickMax : 2020, slideYearPickMin : 1950, minuteStep : 15, /* Control Buttons */ closeTodayButton : true, useCancelButton : true, useClearButton : true, useTodayButton : true, useCollapsedBut : true, }); </ script ></ head >< body > < div class = "container" role = "main" > < form > < div class = "form-group" > < label class = "control-label" for = "db" > DateBox</ label > < input class = "form-control" name = "db" type = "text" data-role = "datebox" id = "db" /> </ div > </ form > </ div ></ body ></ html > |
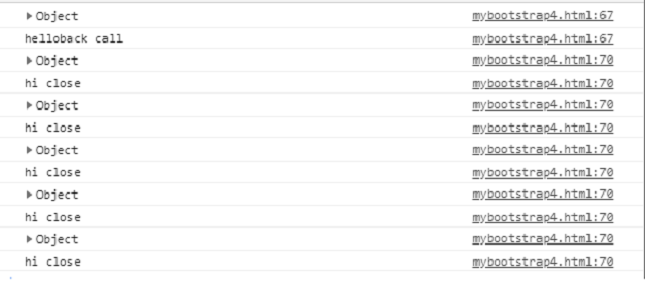
Выход:
Ниже приведен вывод, показанный в консоли, чтобы продемонстрировать работу функций обратного вызова.
Пример 2: Следующий код демонстрирует Bulma. Не забудьте включить Бульм предварительно скомпилированные файлы в ваших кодах Бульма , как показано ниже.
html
<!DOCTYPE html><html lang="en"><head> gh/jgthms/bulma@0.8.0/css/bulma.css" /> <script type="text/javascript" src="../src/js/framework/bulma.js"></script> <script type="text/javascript"> jQuery.extend(jQuery.jtsage.datebox.prototype.options, { /* Modes can be changed as per user*/ mode : "slidebox", /* Display */ displayMode : "dropdown", /* Linked fields */ linkedField : false, slideShowDateList : true, calDateList : [ ["1980-04-25", "JT"s Date of Birth"], ["1809-02-12", "Lincoln"s Birthday"] ], calShowDateList : true, slideDateList : [ ["1980-04-25", "JT"s Date of Birth"], ["1809-02-12", "Lincoln"s Birthday"] ], slideShowDateList : true, calUsePickers : true, slideUsePickers : true, calUsePickers : true, slideUsePickers : true, useCancelButton : true, useTodayButton : true, useCollapsedBut : true, useCancelButton : true, useClearButton : true, useTodayButton : true, useCollapsedBut : true, }); </script> <style> body{ width:550px; padding:10px,10px; } h3{ margin:0 auto; padding:20px,20px; } </style> </head><body> <h3>Datebox in Bulma </h3> <div class="container" role="main"> <form class="form"> <div class="field is-horizontal"> <div class="field-label is-normal"> <label class="label" for="db">DateBox</label> </div> <div class="field-body"> <div class="field"> <div class="control"> <input class="input" name="db" type="text" data-role="datebox" id="db" /> </div> </div> </div> </div> </form> </div></html> |
Вывод: следующий результат, когда разработчик выбрал режим «datebox».
Ниже приведен результат, когда разработчик выбрал режим «слайдбокс».

Примечание . Разработчик может попробовать разные режимы и реализовать различные функции обратного вызова и другие параметры JavaScript в соответствии с требованиями приложения. Для демонстрации показаны только несколько вариантов.
Пример 3: Следующий код демонстрирует средство выбора даты и времени для мобильных кодов jQuery. Не забудьте включить предварительно скомпилированные файлы jQuery для мобильных устройств в свои коды для мобильных устройств, как показано ниже. При необходимости функции обратного вызова могут быть реализованы так же, как показано в первом примере.
html
<!DOCTYPE html>< html lang = "en" >< head > <!-- jQuery mobile libraries --> < link rel = "stylesheet" </ script > < script type = "text/javascript" src = "../src/js/framework/jqm.js" ></ script > <!-- jQuery mobile libraries --> < script type = "text/javascript" > jQuery.extend(jQuery.jtsage.datebox.prototype.options, { /* Mode */ mode : "datebox", /* Display */ displayMode : "dropdown", displayDropdownPosition : "bottomMiddle", linkedField : false, calDateList : [ ["1980-04-25", "JT's Date of Birth"], ["1809-02-12", "Lincoln's Birthday"] ], calShowDateList : true, slideDateList : [ ["1980-04-25", "JT's Date of Birth"], ["1809-02-12", "Lincoln's Birthday"] ], slideShowDateList : true, calUsePickers : true, slideUsePickers : true, useCancelButton : true, useClearButton : true, useTodayButton : true, }); </ script > </ head >< body > < div data-role = "page" id = "main" > < div data-role = "header" data-position
|